Posted on Leave a comment

How to keep your washing line tight

washing line with pegs

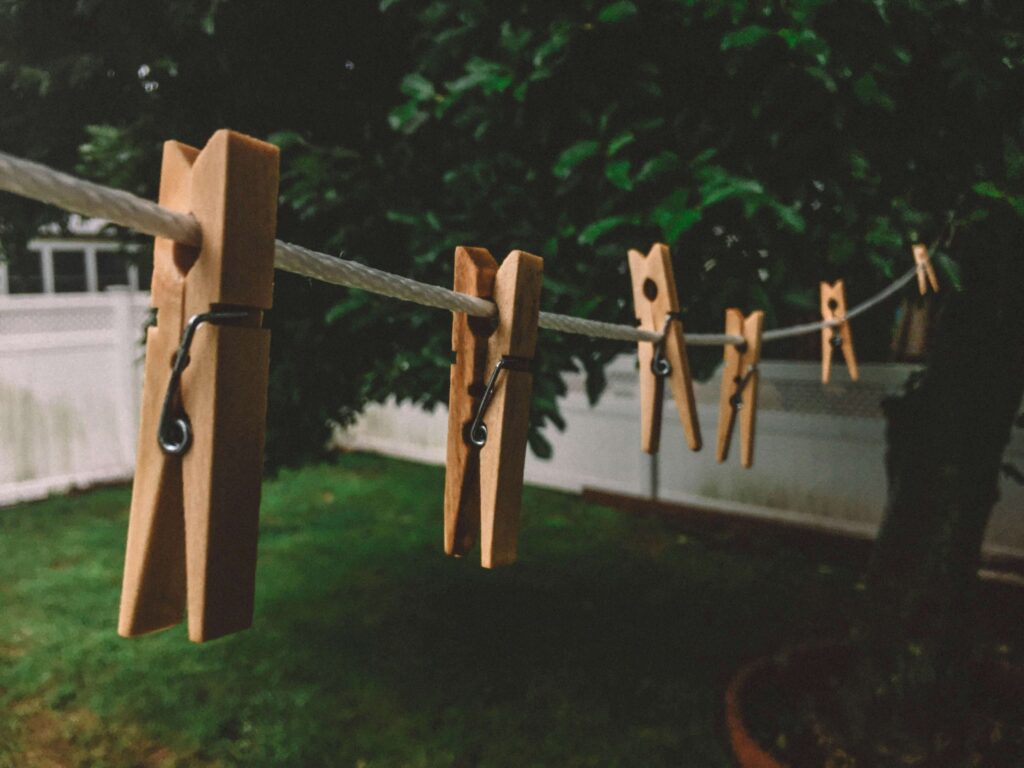
Whilst airers and tumble dryers are a year-round way to dry your clothes indoors, there is no better way to keep your clothes looking, feeling and smelling fresh and doing laundry like a pro, than pegging it out on a washing line. Not to mention, airing your laundry is a great eco-friendly household chore alternative! However, an outdoor washing line does require maintenance to keep it tight and in the best condition.

Why tightening your washing line is important 

Tightening your washing line is important because, overall, it prolongs its lifespan. With time, all washing lines will sag, but many people choose to admit defeat and purchase a new one. However, with the helpful tips in this article, you will be able to prevent sagging, keep your clean laundry off the ground and prolong the lifespan of your beloved, free clothes dryer. 

Types of washing lines

Rope washing line 

Rope washing lines are pretty self-explanatory – they’re washing lines made out of rope or typically some sort of strong cord, which you can hang your wet clothing on whilst they dry outside. Rope washing lines are usually connected wall-to-wall, wall-to-fence or to some other strong structure within your garden. 

The type of rope used in rope washing lines can vary depending on your budget, where the line is situated and the weather conditions it will be outside in. Typically, we would recommend choosing between natural rope or poly rope for your washing line, though PVC and steel core washing lines are also popular. 

Natural washing lines

Natural washing lines, such as cotton and jute are more sustainable and eco-friendly, due to their biodegradable nature. They also give your garden a more natural feel too. Cotton is softer on your hands and clothes, whereas jute washing lines are more hard-wearing and have more water and fray resistance. If you’re looking for the best of both worlds, weatherproof cotton washing lines may be the way to go. 

Poly washing lines

Polypropylene or poly washing lines are one of the most common, and cheapest, washing lines to choose from. Whilst not as eco-friendly as natural washing lines, polylines come in a wide array of colours and are strong, long-lasting and waterproof. 

PVC washing lines 

PVC washing lines, such as our Kleenwash White PVC Clothes Lines, are made with a polypropylene core and outer PVC layer. They are extremely hard-wearing, durable and easy to wipe clean when left out in the elements. Other ranges, such as our Orient Coloured PVC Clothes Lines come in an assortment of colours, to match any garden theme. 

Steel core washing lines 

Steel core washing lines combine the best of PVC and polylines. Whilst the line is thinner than other materials, the steel core within the washing line makes it one of the most strong and durable lines on the market. The PVC outer layer can be easily wiped clean, and the collection comes in multiple colours or a translucent option – to match your garden. 

Retractable wireline 

Retractable washing lines are perfect for homes with little to no space, or for people wanting to tidy away their washing line once they’re done. These lines are mounted on strong structures and extend and lock into the required length at the other side. Made with PVC, these lines are extremely hard-wearing, durable and easy to wipe clean. 

Rotary dryer

Rotary dryers are perfect for gardens that need to dry a lot of laundry, with little space to do so. Compact yet versatile, a rotary dryer may be the best option for you. Rotary dryers typically use PVC washing lines, which make them strong, durable and easy to clean. 

If your rotary dryer’s lines become loose, you can easily switch them out for Rotary Replacement Lines, such as our Long Life Rotary Replacement Line 30M

Ceiling airer 

If drying your clothes outside, for whatever reason, isn’t possible, a ceiling airer may be the best next option for you. Ceiling airers, also known as laundry pulleys, laundry racks or pulley airers, are ceiling-mounted rack mechanisms to dry your wet clothes indoors.

On a ceiling airer, you place your wet clothes over the wooden racks and use a solid braid cotton pulley rope to lift and release the mechanism to your desired height.  

Concertina clothes airer

For an easy way to do your laundry indoors and outdoors, whilst optimising on space and easy storage, a concertina clothes airer could be for you. With a collapsible design, concertina clothes airers are made of lightweight metal or plastic, that can be placed wherever you want your laundry to dry. 

What is causing your washing line to sag?

There are usually 3 main causes that can make your washing line start to sag – overloading, exposure to the elements and damage. 

Overloading your washing line

Overloading your washing line with clothes, regardless of whether it’s made of rope, wire, metal or plastic, will cause the line to sag. This is because the large weight of the clothes applies strain and pressure to the line. 

Exposing your washing line to the elements 

As washing lines are usually kept outside, exposure to the elements such as wind, rain, UV and fluctuating temperatures can impact the integrity of the line and cause it to sag. Some materials may withstand this better than others, such as weatherproof cotton or PVC, however, all materials will succumb eventually. 

Damage to your washing line

Whilst overloading and having it constantly exposed to the elements outdoors can damage your washing line, accidental damage can also cause the line to sag. Accidental damage may look like animals climbing on the line, ball games in the garden gone wrong or a trip-and-pull situation, to name a few – causing the line to fray or snap. 

How to prevent your washing line from sagging 

1. Selecting the right material

Selecting the right material for your needs is going to be one of the best ways to prevent your washing line from sagging. Natural materials are more likely to sag, fray or break as they naturally decompose when exposed to the elements and excess weight. PVC, poly and steel core lines, on the other hand, are more durable, though can still succumb to the same fate without proper maintenance. 

If you only air light loads of laundry in the warmer months, cotton washing lines may be a simple, gentle and eco-friendly option for you to choose from. However, if you typically opt for larger loads and live in a wetter climate, PVC or poly washing lines may be better suited. 

2. Proper installation

Installing your washing line incorrectly is a fool-safe way to expect sagging. But what could an incorrect installation of your washing line look like?

  • Loose washing line 
  • Not anchoring the line securely 
  • Installing the line somewhere where it is more likely to be damaged 
  • Installing the line on loose poles 

3. Regular maintenance of your washing line

Regular maintenance of your washing line is paramount to keeping it in the best condition and preventing sagging. Without regular maintenance, expect more sagging and a shorter lifespan for your washing line.  

Regular maintenance, that you can DIY, includes; inspecting the line for signs of wear and tear (such as frays, bends or stretches), tightening the line, checking the anchors are secure, and cleaning the washing line

4. Tightening and reinforcing your washing line

Washing lines beginning to sag is going to happen, regardless of material, over its lifespan. However, before choosing to replace your line, there are ways in which you can tighten or reinforce the line first. 

Rope tensioners

Rope tensioners or tighteners are a great way to literally pull a bit more life into your washing line and get it taut again. You simply feed the rope through one of the holes, loop it around your post or hook and then feed it back through the other hole and tie a knot. The tension in the line can then be controlled by either increasing or decreasing the size of the loop around its anchor point. A larger loop at the anchor point will pull the line taut, so we recommend that once you have hung your clothes out, pull the line back taut again by sliding the tensioner along. Rope tensioners are included with all of our washing lines. 

Tying a knot 

If you don’t have access to a rope tensioner, tying a knot onto the rope may just do the trick. A simple loop and knot can be slid along the line to increase or decrease the loop around the anchor point and prevent the washing line from sagging – known as a taut-line knot. As with a rope tensioner, the washing line can be tightened by increasing the size of the loop at the anchor point, and slackened by decreasing it.

Washing line props

Washing line props can also push your line up, allowing for a little extra lifespan, whilst also keeping your clean laundry both off the ground and easy to take off once done. Washing line props position your rope to be taut again, by raising it from the central point which pulls the sides tight against its anchor points. Once your laundry is dry and you’re ready to bring it in, simply remove the washing line prop and your line will fall back to its original level.

5. Weatherproofing your washing line

Weatherproofing your washing line is a way to prevent your line from weather-related damage, much of which can cause your line to sag before it eventually succumbs. Weatherproofing your washing line can look like this:

  • Installing the line in a covered location 
  • Cleaning the line, removing moisture and debris 
  • Choosing a washing line made with weather-resistant materials or coating

When it comes to washing lines, we know a thing or two. Head over to our handy Rope Source blog to learn more, or contact our friendly team for some expert advice!

Posted on Leave a comment

Rope decor ideas for your next home DIY project

spools of colourful rope perfect for rope home decoration

Are you looking to spruce up your home with some DIY projects? Why not try out some of our creative rope decor ideas? Rope decoration is a fantastic way to add a touch of rustic or nautical charm to your living space. Learn how to use rope for crafting, and be inspired by some charming crafts that you didn’t know were possible to make with rope. Before you get started, be sure to read our guide to different rope types and their strength, to ensure you select the most suitable rope for your needs. Here are our top four rope decor ideas to inspire your next home DIY project.

1. Hanging rope mirror frame

A nautical rope hanging mirror frame can add a touch of beachy style to your home. You can easily create one with some coiled rope, a hot glue gun, and a circular mirror to start with. To stop the rope from fraying, you’ll need to use the right tools. We recommend using a hot knife rope cutter sealer paired with hot glue to ensure that your rope ends don’t fray, guaranteeing that your nautical rope mirror will last for many years to come! Follow these steps to craft your own rope mirror as the first of our exciting rope decor ideas:

1. Choose your rope

Like with most home DIY projects, this hanging rope mirror frame is fully customisable to your desired finished product. The type of rope you choose for this rope decor idea can completely transform how your rope mirror looks. For example, opting for a decking rope or natural rope will help you to keep a nautical theme. Making a mirror with these ropes can perfectly complement our other simple nautical home decor ideas. Alternatively, you could choose a bright decorative braid for a rope mirror that adds a unique pop of colour to your home.

2. Arrange the rope on your mirror

With your rope of choice, create coils around the border of the mirror. Start with one on the outer edge and work your way in, taping the ends down as you go. The number of coils you choose depends on the size of your rope and mirror, but around four is a good estimate for this rope decor idea. Position the ends of the rope at the top of the mirror, so they can be covered later by more rope. 

3. Glue the rope down

Once you’re happy with the arrangement of ropes on your mirror, it’s time to glue them down. Use a hot glue gun to do so, as this is the best type of glue to use for all types of rope, from jute to sisal rope. However, don’t glue the ends of the rope, as we will cover these up in the next step.

4. Cover the ends

To cover up taped ends, unwind a portion of the rope to get a thinner piece. Then, wrap this rope around the ends until they are covered. Be sure to glue this rope down securely at the back of the mirror.

5. Hang the rope mirror

With another piece of rope attached to the back, hang your newly crafted nautical rope mirror in a place where you can show off this impressive home DIY project. If you want to really embrace a nautical home decor theme, hang the mirror from a dock cleat like in the image above.

2. ROPE BASKET BOX

The perfect addition for any room in your home, why not create a homely box basket using some twisted jute or natural rope? All you need is a cardboard box, your rope of choice, a hot glue gun with glue sticks, and scissors. 

1. Cut the box

Choose a cardboard box of your desired size – but bear in mind that the larger the box, the more rope and glue you will need. Cut the top flaps off the cardboard box with a pair of sharp scissors. 

2. Glue rope to the box

Begin wrapping the rope around your now flap-less box. It’s easiest to start at the bottom, using your hot glue gun to secure the rope in place as you go. When you reach the top, cut the end of the rope using a hot knife cutter or your scissors, then glue down the very ends, including any frays. 

3. Use fabric to line the box

Now that you have the outside of the basket box looking perfect, it’s time to cover the cardboard interior. Use fabric to line the inside – any type of fabric will do, from coloured hessian rolls for a bright, fresh craft, to classic white muslin like pictured.

3. DIY ROPE VASE

Add a touch of rustic style to your home with a decorative rope vase, which can be displayed alongside these other 5 rustic design ideas for your home. You’ll need a vase, twisted jute rope, a glue gun and glue sticks, scissors or a rope cutter, and a heavy clip. 

1. Choose a style of rope

This rope decor idea is fairly straightforward, which means the rope you choose can make all the difference in the overall look. If you are opting for a more rustic rope vase, choosing a plain natural rope will deliver this look. However, you can really customise this craft with a variety of decorative braids, from coloured cotton and decorative polypropylene braids, to metallic braided polyester for a more luxurious look. Take a look at our guide to the best uses for decorative rope for more home DIY projects to undertake with any leftover rope!

2. Attach rope to the base

Grab your rope of choice, and add some hot glue to the inside of the rope end. Attach the rope to the base of the vase, then begin to coil it around the base tightly, adding glue to the rope. When you reach the top coil at the end, add an extra dab of glue to make sure it’s completely stuck down.

3. Let the glue set

Use a heavy clip to clamp the rope so it is secured and let it sit for a few minutes until the glue is completely set.

4. Perfect your rope vase

If you use scissors rather than a hot rope cutter to cut your rope, you may have frayed ends. Be sure to sort these out at the end, using extra glue to fuse the ends together and minimise the risk of your rope vase slowly falling apart.

4. NAUTICAL ROPE COASTERS

Learn how to make nautical rope coasters in just 3 easy steps. This is a super easy rope decor idea, as all you need is some rope and a glue gun!

1. Coil your rope together

Create a small, tight coil with your rope and glue it in place. Continue to coil and glue the rope until it reaches the perfect coaster size. 

2. Finish the ends

As you reach the ends of the coaster, use some extra glue to make sure the end is strongly stuck down. There may be some fraying, so we recommend using a hot knife rope cutter to seal the rope before you glue it down.

3. Decorate your coaster

This next step is optional, but means you can customise your rope coasters to match any theme or aesthetic you like. Create your own stencil – or simply freehand – and use paint to add designs to the top of your coasters. However, be wary of the texture of the rope, as this may not be the easiest to use brush strokes on. Let the paint dry completely before using.


These simple DIY rope decoration ideas are bound to spruce up your home, and are perfect for matching any aesthetic. Our blog is overflowing with rope decor ideas, including this gorgeous rainbow rope wall hanging. Why not take a look at our extensive range of ropes, twines and cords, perfect for inspiring your next rope decoration project! Feel free to contact us to find out some more.

Posted on Leave a comment

7 helpful uses for sandbags at home

pile of hessian sandbags

We’re all familiar with the image of sandbags piled up in the midst of a Hollywood blockbuster shoot-out. But what are the practical, everyday uses for sandbags? There are many uses for sandbags that can benefit yourself and your home. Read on to uncover the top seven uses for sandbags – some of which you may have never known before. 

1. Protect from floods

Undoubtedly the most common use of sandbags around the house. Why? A sandbag wall is the perfect defence mechanism against floods. So if your area is prone to flooding, be sure to keep some sandbags in the house in case of an emergency. Building a sandbag wall is a cheap, easy, and effective way of minimising the risk of serious damage to your property. Not sure where to begin? Our guide on how to prevent flood damage with sandbags tells you exactly how to fill, stack, and waterproof a sandbag wall. 

2. Yoga

Did you know that you can use sandbags for exercises such as yoga? Yoga sandbags are simply sandbags that are used during your usual yoga session. They can be utilised in different ways to make things both easier and more challenging, depending on your goals for that session. Learn how to make yoga sandbags, using a variety of different materials for a cheap and easy yoga accessory. 

3. Weights

Sometimes, outdoor items and furniture may need some extra help to stay in place. Sandbags can be used to weigh down any outdoor items to prevent them from being knocked over or blown away in the wind. Simply fill and tie a sandbag up, then place it at the base of whatever needs to stay grounded. Try using sandbags for tents, garden furniture, or even balloons if you’re throwing a party. They can also be used to weigh down awnings by tying them together with rope

4. Improve traction with rear-wheel-drive

When driving a rear-wheel drive vehicle on slippery roads, it helps to have weight towards the back of your vehicle. So, if you don’t frequently have passengers or equipment in the back of your vehicle, then sandbags can help with traction in slippery conditions. Place sandbags somewhere secure towards the back of your vehicle, over the rear axle. This will usually be in the boot of your car. Just bear in mind that sandbags should always be positioned as close to the rear wheels as possible – as long as it’s safe, of course. 

5. Prevent erosion

Erosion is an issue caused by exposure to wind and water, which can quickly escalate to cause more serious structural damage. Luckily, sandbags prevent erosion by providing extra support to walls or roadways. Since sandbags are not a permanent solution, this means they can be easily moved and rearranged. Hessian sandbags are perfect for supporting natural structures, as the natural fibres will break down and merge with the surrounding landscape over time. 

6. Physical training

Using sandbags for exercise doesn’t stop at yoga; there are a whole range of ways to utilise sandbags for physical activity. The most obvious way to use sandbags would be to practise strength training. Hold the sandbags like you would any heavy item for a cheap alternative to weights and dumbbells. You can pair sandbags with basic exercise like squats and lunges for a more intense workout too. The best thing about using a sandbag for exercise is that the weight is so easy to adjust. All it takes is a couple of minutes to empty or fill your sandbag to achieve your desired weight. So if you’re worried about buying tonnes of weights, you won’t have to anymore. A sandbag is really all you need for home strength workouts. 

7. Shooting gun rest

If you enjoy shooting clay pigeons as a pastime, then you’ll likely know that a gun rest is incredibly helpful for improving stability. However, there’s no need to splurge on an elaborate, expensive gun rest – a few sandbags piled up does just the trick. Many gun rests are made from similar materials to a sandbag too, so why not save yourself the cash? Plus, by creating a sandbag gun rest yourself, you can customise the exact height and shape that is most comfortable for you.


Are you ready to put sandbags to use around your home? Use them alongside our high quality ropes and cords for incredibly strong DIY materials – suitable for use around the home and garden. Contact Rope Source to learn more about what we have to offer.

Posted on Leave a comment

How to prevent flood damage with sandbags

flooded street with sandbags in front of door to prevent flood damage to property

Rain is inconvenient for lots of reasons, but flooding has the potential to severely damage your property. The risk of flooding is one you shouldn’t ignore, but luckily there are some simple ways to limit the damage. 

You can use sandbags for flooding protection, and this is an affordable way of preventing water damage. Because sandbags are usually made from hessian fabric, they are easy to stack on top of each other. 

Read on to learn how to make sandbags that will prevent flood damage to your property. 

How to fill your sandbags

How many sandbags will you need?

Depending on how large your sandbag wall needs to be, you need to work out how many sandbags you actually need. It’s usually recommended to have around 60 sandbags. This will create a sturdy wall that’s one foot high and ten feet long. You should also calculate how much sand is needed to fill all of the bags – an average sandbag will take around 35-40 lbs of sand to adequately fill. Do all these calculations before starting work on your sandbag wall to prevent any mishaps or delays in building your wall. It’s better to overestimate than to underestimate, so plan for your wall to be slightly higher than you initially want it to be. 

How much you should fill your sandbags

Sandbags should only be filled about two-thirds of the way. A sandbag that’s too full will be difficult to work with and carry. One that’s not full enough will be difficult to stack, and it’ll take more bags to create a nice, sturdy wall. Keep your sandbags between halfway to two-thirds full with sand for the best results.

Sealing your sandbags

Don’t tie your sandbags – this makes them difficult to stack and doesn’t allow the sand to move around as much. Instead, close the bag by folding the top of the sack over and placing it down. Make sure the bag is nice and level so that your wall doesn’t become lopsided and uneven.

How to build the sandbag wall

Positioning the sandbag wall

Before you begin building your sandbag wall, remove any debris or other clutter out of the way. You’ll need your surface to be as flat and even as possible. This will make the wall building process much easier and ensure that it stays standing. 

Make sure to leave a gap between the sandbag wall and your property. If the pressure of the water forces the sandbags against the wall, this could cause more damage. Instead, leave around 8 feet between the sandbags and your building to prevent any structural damage. Because the sandbag wall shouldn’t be leaning on anything else, it’s especially important to build a strong foundation for your wall.

Constructing the sandbag wall

Now that you have cleared the best area for your sandbag wall, it’s time to start building it. This is a strenuous task, and it’s recommended that you have a couple of other people to help you. To start, you should aim for a wall that’s 3x wider than it is tall. This means your bottom layer will contain the most sandbags, creating a solid foundation. Lay out a row of sandbags side by side, and continue to add more rows behind it until you’ve created a base that’s roughly three feet wide. 

Next, begin on the second layer of sandbags. These should be offset so that they’re in the middle of the previous row of sandbags. Place each sandbag directly in the middle of the sandbags below it, so that each layer you add begins to create a pyramid shape. Continue this process until your sandbag wall is at your desired height.

Waterproofing

Once your sandbag wall has been constructed, you’ll need to waterproof it with some plastic sheeting. This should be placed only on the side of the wall that the water will be coming from. Place sandbags at the top and bottom of the sheet to keep it in place, making sure the sheet isn’t stretched too tight. If the sheet is stretched tight, the force of the water could rip it, allowing water to permeate through your sandbag wall.


Your sandbag wall should now be complete, and your property will have an extra layer of protection from flooding. For a wide range of DIY materials from washing line rope to macrame cord, contact us for great deals.

Posted on Leave a comment

How to create space decor for your home

Is reality getting you down? Fancy hopping in a spaceship and zooming off to another galaxy? For those who love a good crafting project, you’re sure to go all starry-eyed over these other-wordly space decor ideas for your home – perfect for adding a sense of playfulness to your space. 

Star light garland

For walls that are looking a little drab, why not decorate with a twinkling star light garland? Either cascade from your bedroom ceiling to pretend you’re gazing up at the night sky, or hang in your living room to instantly transform an area from cold to cosy. If you’ve got some Christmas lights that are collecting dust in your attic, why not put them to good use and incorporate them into your star light garland design?

To start, get some crafting foam and cut out star shapes, adding a hole to the middle for the lights to be pushed through. After doing this, screw the bulb back into the cord.

Following a similar method – which is ideal for those who also love a bit of nautical home decor – use manilla rope to create a thicker garland, twisting some fairy lights around it to enhance the outer space aesthetic. Finally, attach your stars to the thicker rope with some cotton string, knotting each in place as you go along. 

Planet mobile

Stare into space with a planet mobile 

Create your own mini solar system with this space mobile, using just a few simple tools. To begin, use a compass to sketch out your planets and sun onto a piece of white card. Once you’ve cut these out, you can paint them in a variety of different colours, using swirling and splodging techniques to add further depth.

To create a 3D effect – and to make your crafting project look all the more lifelike – you could make a slit from one edge of your planet to the centre, repeating the process with another circle template, slotting them together.

Next, make a small hole at the top of each planet, threading a piece of cotton string through, securing everything in place with a tight knot. The top of these pieces of string can then be attached onto a large circular cut out, made with a black piece of card – simply use a pin to make the small holes to indicate where you want your planets to hang. 

Outer space sun catchers

There’s no need for a telescope with DIY cosmos sun catchers – bring the cosmos to your living room as the sun seeps through the magical kaleidoscope of colours.

For this space-themed project, you can upcycle some clear plastic plates or containers that are no longer in use, which will be your base. Purchase some stained glass paints in colours of your choice, some white acrylic paint, and some paint brushes so you can start bringing life to these captivating pieces. Of course, precision isn’t necessarily needed during the initial steps, as you’ll want the paints to collide with one another to give the impression of a swirling cosmos.

Once you’ve left your paint to dry overnight, you can sprinkle some acrylic paint diluted in water over the top to make your stars, using some glitter for an added touch of sparkle. Finally, cut out circles of varying diameters, and now you’re ready to stick these beauties to your window. 

Constellation canvas

Unleash your inner artist and part-time astronomist with a lighted constellation canvas. Head over to your local craft store and locate a regular, white canvas (in a size of your choice) and a tub of black paint for the night sky you’re about to create.

Paint the entirety of your canvas black, and once this has dried, you can use a white marker pen to start sketching out your chosen constellation – armed with a reference image. This could be picked at random, or perhaps you’d like to choose one that belongs to your star sign?

Once you’ve finished sketching the constellation, punch some holes in the back of your canvas in areas where you’d like your lights to shine through. Now switch on those lights, find the perfect place to hang your fantastic new piece, and admire your outer space creation. 

Galaxy drink coasters

In search of some quirky table accessories that are out of this world? Look no further than these creative DIY galaxy drink coasters.

Using an unfinished wooden coaster as your base, paint this black with some multi-surface paint. Once left to dry, use a sponge coated in shimmery paint to dab random splodges of colour over the top. Give your sponge a clean, and throw another colour into the mix – it’s okay if they start to overlap. For the galaxy look, add more black paint over the top, dabbing gently to create a cloudy, dream-like pattern.

Next, use glitter paint to add some stars, and – once left to dry – pour a thin layer of Mod Podge on top, spreading it right up to the edge of your coaster with a paintbrush. Leave for up to 24 hours, and now you’ve got yet another brand new piece of space inspired decor. 

Here at Rope Source, we have everything you need for your next crafting project – whether you’re transforming your home decor or otherwise. Get in touch with our team today to discover quality ropes and twines

Featured image credit: Mon Makes Things

Posted on Leave a comment

Top tips for new homeowners

Small house with keys

We understand that moving house can be a stressful process; with so many factors to consider, it’s easy for your head to become scrambled. To help you prepare for your next chapter, we’ll be sharing our new homeowner tips to make a smooth transition. We’ll be covering everything from when and how to start planning, right the way through to the exciting part; decorating. Now that you’ve got your pen and paper at the ready, let’s get started. 

How to plan moving out

It’s never too early to start planning the big move. It can be underestimated how long it takes to plastic wrap all of your valuables, form a collection of boxes in various different sizes, along with the tedious process of then labelling every box. Sounds draining, right? The key is to start as early as possible, creating a clear list of each task you need to complete before moving. You can then organise these based on priority. Nothing good comes from rushing, and you might even end up forgetting something. Take a gradual approach, hack away slowly, and try to keep calm. 

Home removals

Now that all of your belongings are safely packed up in boxes, don’t risk playing Tetris in your boot. The process will be made much simpler when relying on the help of a removal company – make sure to book them in advance. To help out, dismantle larger items prior to your move to prevent walls getting scraped.

Cleaning

There’s no avoiding it, a big clean up of your new home will have to take place at some point. It’s easier to pay a visit before moving in (if possible) so that you can get everything looking shipshape, and you won’t need to worry about working around your furniture. If your home is a new build, check for any screws, nails or hooks on the floor, and give everything a good dusting. 

Meeting the neighbours

Introducing yourself to the neighbours may seem like a daunting task, but if you avoid it, you could end up missing out on making friends for life. As cringy as it sounds, why not say hello armed with a plate of bakes, with the hope that they’ll return the favour at some point. Alternatively, if the weather is warm, organise a BBQ to show off that wonderful new garden of yours. Alongside the social benefits, you could also take the opportunity to ask them whether there are any plumbers or electricians they regularly rely on – which is ideal if you experience any future hiccups. 

Decorating your new home

This is where you can start to turn your house into a home, and it’s the perfect opportunity to unleash your creativity. Although it’s tempting to go overboard with brand new decor, why not save yourself some cash – and have a bit of fun – with a DIY project? For those who dream of a rustic aesthetic, get inspired and have a read of our previous blog post; simple nautical home decor ideas. Jute rope and manilla rope are ideal for home decor, so whether you choose to create a coaster, beachy mirror, or rope entry mat, let your imagination run wild. And don’t stop there. Kit out your new garden with decking ropes, outdoor furniture and twinkling fairy lights for ambiance. Need some inspiration? Head over to our previous blog post for some more fabulous decking for your garden ideas

Homeowner’s journal

It’s likely that you’ll start collecting plenty of paperwork as you settle into your new home, but storing all documentation – from maintenance receipts to insurance papers – in a homeowner’s journal is a great way to stay organised. 

From kitting out the inside of your home, to impressing your new neighbours with your garden decor skills, Rope Source has everything you need to get started. Get in touch with us today to learn more about our range of ropes, cords and twines

Posted on Leave a comment

Simple nautical home decor ideas

Home Décor on a Chair

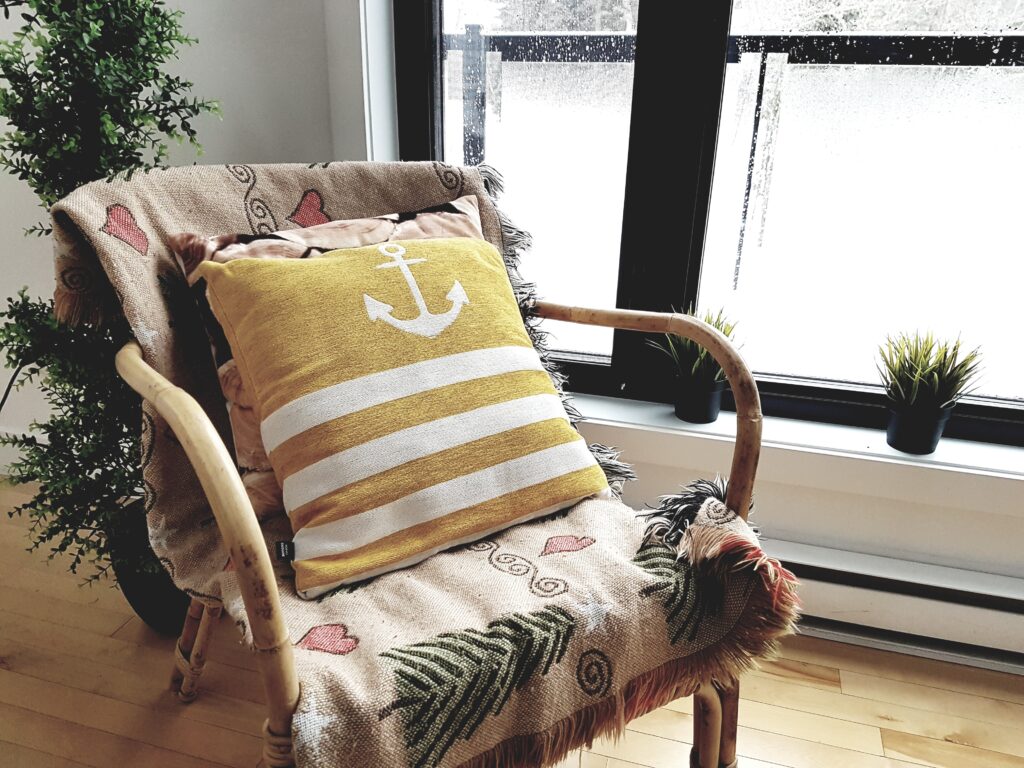
If your home is in need of a revamp, what better way to transform your space from bland to beachy than with a few easy DIY projects? With these simple nautical home decor ideas, you can craft your very own pieces of furniture using easy-to-find materials, making use of natural, earthy tones, alongside the traditional sea blues and peaceful whites for a wonderfully playful theme. Let’s set sail and get straight to it… 

Nautical wreath

There’s no better way to get your front porch looking shipshape than with a DIY nautical wreath, a decorative take on a life preserver. All you’ll need for this easy crafting exercise is a foam wreath – you’ll be able to find one of these in a pound shop or hobby shop – a ruler, scissors, straight pins, cotton rope and two different colours of fabric – take blue and white as a classic, sea-themed example. Once you’re equipped with the materials, start to wrap your white fabric around the foam wreath, securing the beginning and end of your fabric strips down with the pins. Continue the wrapping motion until you’ve made your way around the whole wreath. Next, add the contrasting blue fabric to around ¼ of the wreath. 

To add the finishing touches, use your decorative cotton rope to place evenly around the wreath’s edges, pinning in place once complete. 

Rope vases 

Rope-wrapped vases make the perfect nautical decorative pieces, being a DIY method that’s as easy to follow as it is cost-effective. It’s a brilliant way to upcycle bits and bobs you may have lying around the house, such as empty food cans, that can be transformed into a fancy piece of furniture (although it may seem impossible at first). You’ll also need to equip yourself with jute rope – which is the ideal choice for adding a touch of nautical flair – super glue and scissors. Simply start at the bottom of your chosen can, swirling your rope around the edge and using a small dot of glue every so often to secure everything down. Work your way up to the top, snipping the rope and gluing the end down when complete. Who says that redecorating can’t be cheap? 

Nautical mirror 

A fun way to spruce up any basic mirror; why not wrap manilla rope around the edge to look as though it were hanging in a beach hut? To craft your own DIY nautical mirror, find a board that it can be super glued onto for a sturdy base, using your manilla rope to wrap around the outer edge of the mirror to make the frame. Prop your new mirror against a wall as it is, or you could add screws and wire to the back to make a hanging mechanism. 

Coasters

DIY nautical coasters are yet another super simple craft, and a great way to make your dining table look more inviting. You can use manilla rope for this one due to it’s durable, flexible and water-resistant qualities – protecting your table against any inevitable spillages. To make your base, you’ll need to find a circular object, such as a CD, and fabric to super glue onto your template. When choosing the latter, just make sure that the material is strong and won’t be prone to fraying. Using your circular object as a stencil, trace around onto the material and cut out when you’re done. Next, hold your rope in the centre of the circle, and start spiralling it around, working your way to the outer edge. Snip your rope at an angle when you’re done, and secure it in place. And that’s all there is to it! Another simple nautical home decor idea that only takes a few minutes to create. 

DIY rope entry mat

The technique used to craft a DIY rope entry mat is almost identical to your nautical coasters, but you’ll need a lot more rope – depending on how big you want to make it. To set-up your crafting space, lay tarp or a cloth on the floor to protect the surface from superglue. Tape in place for sturdiness, and now you can begin spiralling your rope from the centre to the outer edge. When you feel as though your mat is big enough, snip off the end of your rope and secure it down. Simple.

Beachy garland

Who doesn’t love a bit of bunting? Not only will this brighten up your home and look fantastic on show during summer garden parties, it’s even more rewarding to step back and admire a product that’s been crafted from scratch. To start your next DIY project, you’ll need a heavy duty rope that’s able to support your hanging decorations – again, manilla rope is a good one for this – and twine to tie your decorative pieces to the main rope. Taking inspiration from Finding Home’s method, you could use mason jar caps, shells, starfish and even driftwood to really bring out your maritime aesthetic – so if there’s any excuse to go scavenging on a beachy getaway, it’s this. All you’ll need to do is glue your nautical objects onto the twine, tying each one onto your main rope to finish off your nautical garland. 

If these simple nautical home decor ideas have piqued your interest, we have all the resources to support your next crafting project. Get in touch with our team today to see which of our high quality materials, from rope to twine, is best for you. 

Posted on Leave a comment

How to make your home cat friendly

cat playing with string

Creating the purrfect environment for your new feline friend is essential for ensuring that you have a long, happy life together. But if you’re a complete beginner, what’s the best way to start getting your home cat ready? Even though cats are now well-known for being domesticated animals, their wild tendencies still remain. By going back to their roots, it becomes much easier to figure out the type of environment your cat would best thrive in, being one that enables them to carry out their natural behaviour. Luckily, your home’s trash can become your cat’s treasure, so be prepared to get involved with a spot of DIY. Let’s start making your home pawsitively cat friendly…  

DIY scratching post

One thing’s for sure, cats love to have a good scratch. There’s just no preventing it, and you’ll definitely start to notice your furniture suffering if you don’t provide them with something to get their claws into. A scratching post is ideal for this, allowing your cat to mark their territory whilst keeping claws at a healthy length – even better, it’s super easy to craft one yourself! 

To get started, all you’ll need is any rope or twine that has a good texture to it, the materials to create a post and base, and something to secure everything together. To create the base, you could use well-sanded plywood, or an old PVC pipe to experiment with the shape. Grab your rope or twine, and begin wrapping it around the post, using super glue to secure everything in place. For the base, wrap it in felt or any other soft material that’ll be comfortable for your cat to hop down onto, and you could even decorate the edges with faux fur for something extra. Finally, attach the two parts together using some screws, and that’s it! 

DIY cat wand

Take a leaf out of Irresistible Pets’ book and craft your very own cat wand, perfect for preventing boredom. As mentioned previously, wild cats were used to being constantly stimulated by their natural environment, whether this be catching prey or fleeting from a predator – to put it simply, they’re not cut out to live a dull life. With this in mind, put your bits and bobs drawer to good use and fill up your cat’s toy box, so that you can start to make your home cat friendly. 

To make a cat wand, arm yourself with baker’s twine, a wooden dowel, jingle bells (this is a great way to make use of any Lindt bunny neckties you’ve been saving), fabric scraps such as ribbons or shoelaces, and fabric glue. 

Start by wrapping the baker’s twine around the wooden dowel, leaving some excess string of up to about 12 inches so that you can attach your fabric scraps. Secure everything in place with some fabric glue and tie your scraps to the end of the twine, weaving some jingle bells in there too. And that’s all there is to it! A brand new toy for your cat, without the cost. 

Pet-proofing your home

Before letting your new cat loose around your home, a pet-proofing exercise is definitely in order. You may need to get at a lower level for this, so that you can really start to see things through a cat’s eyes. Are there any dangerous household appliances around, such as hot or sharp objects, or a wire that could be chewed through? Could anything be knocked off a table or shelf? Kittens especially are curious little creatures, so it’s important to prepare for the worst case scenario. You may choose to section off some rooms that your cat isn’t allowed into, so be sure to remain strict with this and stick to a consistent routine. 

A hiding place for your cat

Although we’ve mentioned that it’s important to make the safest environment possible for your feline friend, it’s inevitable that certain cleaning appliances or guests coming round to visit may evoke anxiousness. For times when your home is busier or louder than usual, make sure that your cat has a variety of safe spaces to hide in. This could be an empty cardboard box on its side with a comfy blanket inside to snuggle into, or an outdoor cat house. Cats also love to hide up high in order to clearly evaluate their surroundings, so make sure that these types of spots can be reached without injury. Use shelves, cushions or other small furniture items to create safe, cat-friendly steps. 

Puzzle feeder

Cats in the wild would have to work for their food, so make dinner time a little more entertaining with a puzzle feeder (a more cost-effective option!) For this, you’ll need an empty tub of your choice, a knife, string, a paper straw, a screwdriver, and some cat treats, of course! Start by creating two small holes in the tub with your screwdriver at opposite sides, sliding a straw through both ends to begin creating your handle. Thread the string through, tie it up at the top, and snip off the excess. Finally, create holes in the bottom using a knife that are a little bigger than your cat’s treats, being sure to trim off any sharp bits of plastic. Now you’re ready to put in the treats, suspend within reach, and introduce to your cat! 


Now that your home is cat friendly, what other DIY projects could you get involved in? For more crafty ideas, and to learn more about the extensive range of ropes and twines we have on offer, get in touch with our friendly team of professionals today!

Posted on Leave a comment

How to divide household chores to make it easier

woman cleaning house

What are the benefits of dividing household chores? 

We understand that finding the time to clean can be tough, especially when you’re trying to juggle work, family life, and not to mention setting aside some alone time. Feeling as though it’s your responsibility to keep your home in tip-top shape is incredibly daunting, and can lead to burnout if you’re not careful. This guide to dividing household chores is all about gaining mutual levels of understanding and respect, so that you can have some much needed time to relax without fear that the laundry hasn’t been done. A clean home leads to a clean mind after all, so we’re here to help you get there, minus the stress. 

Communicate!

Communication really is key, especially when it comes to dividing household chores. If you’re feeling as though everything is piling up on you, communicate this with your partner, other members of your family, or flat mates. Whatever your situation, never be afraid to ask for help, and allow those around you to recognise that the stress is starting to take its toll. By talking things through calmly, the anger felt towards those that are not pulling their weight will begin to subside, allowing you to relax in your own home. Who knows, they might not even realise that they’re doing anything wrong without you communicating your concerns to them. 

Cleaning schedule

The first step to getting your home looking shipshape is to devise a cleaning schedule that clearly indicates which chores need to be done on which days, and whose job it is to complete the task. This way, each member of your household will be able to see what their responsibilities are, and you’ll be able to stay on top of important dates (such as bin collection days) that may be forgotten. You should also make sure that household chores are split evenly, keeping track of who may have done more, or less, than everyone else. 

Chore rotation

A cleaning schedule is a great way to make sure that house chore responsibilities are rotated regularly, so that someone isn’t constantly taking the bins out. By switching things up every now and then, chores are less likely to be seen as a tedious, repetitive task. Just devise a system that works well for you and your household, and remember to keep some chill time free amidst the cleaning! 

Chores for kids

It is actually possible to make household chores fun – believe it or not – and cleaning could start to become a family bonding activity. By teaching the kids from a young age about the importance of taking responsibility, you’ll be much less likely to experience any future conflict. Get creative and craft your own chore chart to document progress (more on this shortly), making the connection between taking responsibility and receiving rewards. This will make it much easier to get into a regular routine. 

You could even get the kids involved with some DIY, helping them to craft their own laundry basket. We were inspired by Spruce Crafts’ easy method, simply requiring a large plastic container, a length of rope (the larger the container, the thicker the rope), embroidery thread, scissors and a hot glue gun – make sure that this bit is done by an adult. Begin at the bottom of the container, swirling the rope and sticking it down accordingly until it reaches the outer brim, using the excess to create the handles. Sew the pieces of rope together using embroidery thread, experimenting with colours to make your basket as decorative as you like. Et voilà! Who said cleaning and craft can’t go hand-in-hand? 

DIY chore chart

It’s time to get creative once more by making a chore chart, allowing you to easily keep track of what needs to be done around the house. Taking inspiration from Eclectic Recipes’ method, all you’ll need is card (in the colour of your choice), sticky letters (or you could nominate yourself as the scribe if you prefer), a length of rope, cord or twine to create the handle, and a few clothes pegs with each chore written on them. Divide your chore chart into two sections, so that you can clearly distinguish what has, or hasn’t been completed, moving the pegs accordingly. 

For more advice with any DIY projects you’re keen to get your teeth stuck into, our team of friendly professionals are on hand to help. We have everything you’ll need to get the job done, regardless of the field. To find out more about the stock we have on offer, get in touch with us today! 

Posted on Leave a comment

4 new hobbies to do at home this year

macrame for hobbies

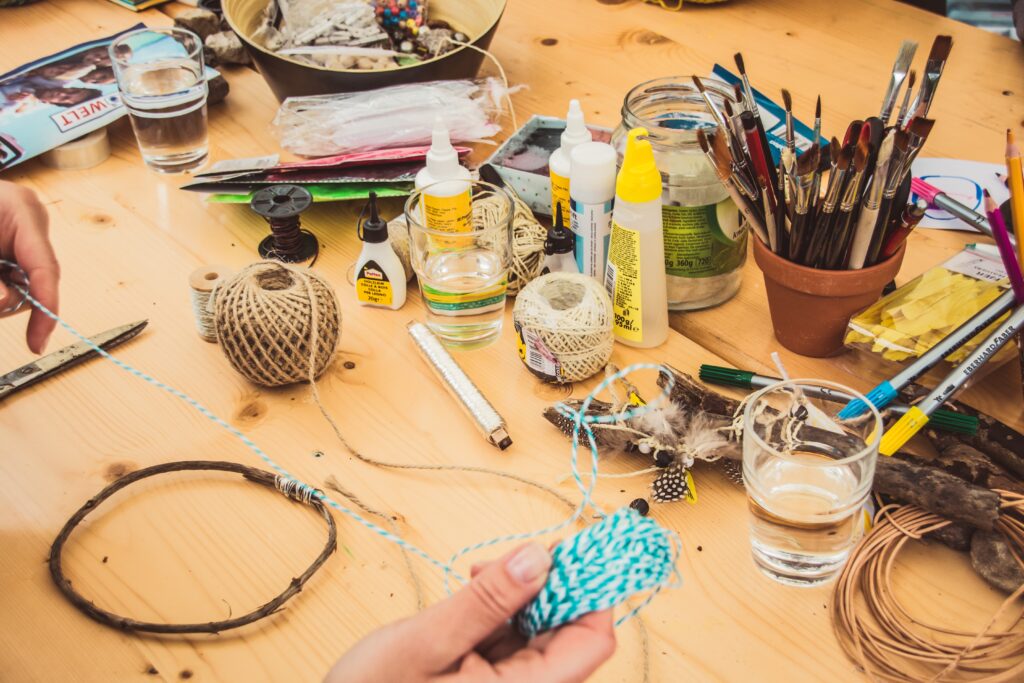
The rain is pouring outside, and you’re stuck at home with nothing to do. It’s times like these where thoughts of adopting a new hobby seem particularly appealing, but where to begin? Thankfully, you need not look much further than your bits ‘n bobs drawer, crammed full of crafting pieces that can be used to create something brilliant. To get you started, we’ve compiled a (beginner friendly) list of four new hobbies for you to do at home this year. Wave goodbye to the indoor blues!

Homemade interior design

There’s no better feeling than transforming a house into a home, and what better way to inject some life into your space than taking up a new hobby by designing your own interior? If you’ve already had a read of our previous blog post on the best rope decor ideas to renovate any home, you’ll know that it’s not actually as difficult as you may think. Anyone can purchase furniture items from their local shop, but there’s something about doing it yourself that makes the whole experience a bit more fun. Perhaps you could use twisted jute rope to craft your very own rustic rope vase, full of your favourite florals, or get to work with some cotton rope and create some coasters, photo frames and mason jar lids. 

You need not stop here either. Taking up interior design as a new hobby is a fun way to bring something extra to your space, proving your creative crafting abilities to your family and friends. Using decking for your garden makes for a much more pleasant experience when the neighbors come round for a glass of wine, creating plant displays or garden bridges with manila decking ropes and polyhemp/ hempex ropes.

Passion for plants

Discovering a passion for plants is another productive hobby, used to add an extra pop of colour and much needed freshness to your home. With benefits a plenty, they’ve also been scientifically proven to boost health and mental wellbeing, so if there’s ever a time to begin growing your very own jungle, it’s now. Species such as spider plants, string of hearts and pothos have tumbling leaves that look stunning when cascading from the ceiling, so craft yourself some hanging planters using macrame twine to complete the biophilia aesthetic. This rope has a great deal of other uses too, so take a peek at our blog post on the best macrame cord craft ideas for some more inspiration. 

Making your own clothes

Learning to sew is another hobby you could take up at home this year to not only save money, but to put your new found crafting skills to the test. It doesn’t take a fashion designer to use a sewing machine, so start off slow and take a look at some YouTube tutorials to get yourself started. Once you’ve equipped yourself with needle and thread, select some scrap pieces of fabric or choose an item of clothing you’d like to upcycle. Use decorative braids for added creativity, or have a go at visible stitching to create some fun patches for a totally different look.  

Scrapbooking

Scrapbooking is another effective way to reduce anxiety and stress, instead pouring your emotions out onto a piece of paper and documenting your most fond memories. Perhaps you saw the first signs of autumn when out on a walk and enjoyed the sound of leaves crunching under your feet, or maybe you went to the beach and found an unusual shell. Whatever the occasion, there will be either a material or an item that can be stuck into your scrapbook – there are no rules to this hobby, so experiment as much as you can with different colours and textures. Another technique that can be used when scrapbooking is string pull painting; simply snip a piece of yarn or twine to roughly 18 inches, dip into acrylic paint and coat fully (except the tip), lay on a piece of paper as you wish, sandwich a piece of scrap paper on top and lift up the string. And with that, you’ve just created your own unique artwork!

If you’ve finished reading this blog feeling inspired to start some new hobbies, take a look at our vast collection of crafting ropes. If there’s a particular DIY project you’re looking to start and you need some advice on the best rope to use, have a chat with our team of friendly professionals today.