Posted on Leave a comment

30 things you can do with macrame cord

Assorted Pack - Macrame Cord/ Twine Coloured Spools

Macrame has made a stylish comeback, captivating DIY crafters once again with its blend of simplicity and rustic style. 

Whether you’re new to macrame or seasoned in using rope for crafting, macrame cord is an essential tool – offering endless creative possibilities. From intricate wall hangings to functional and fashionable accessories like handbags and jewellery, macrame cord is the versatile material behind it all. 

Keep reading as we explore 30 inspiring ways to use macrame cords, showcasing just how this simple cord can be transformed into stunning decor, gifts, and practical items. Dive in and discover your next macrame project!

What is macrame cord?

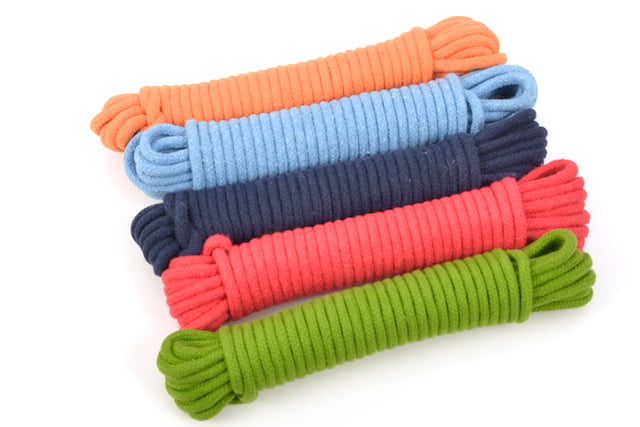
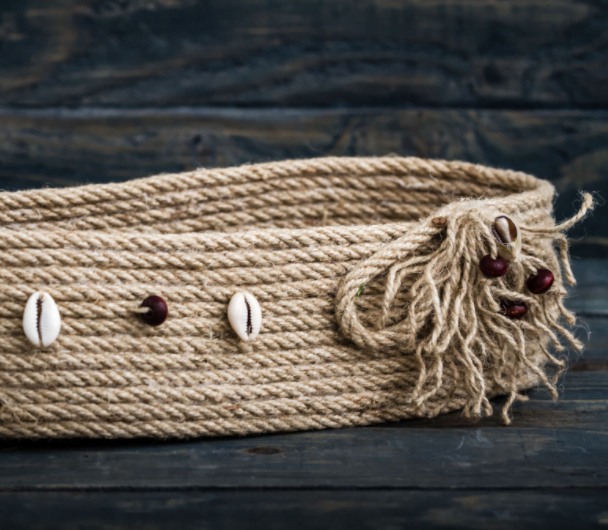
Macrame cord is a type of thick, strong cord or rope, often used in the art of macrame – a craft that involves knotting cords to create decorative patterns and designs. It is typically made from natural rope fibres like cotton and jute, or synthetic materials like nylon. 

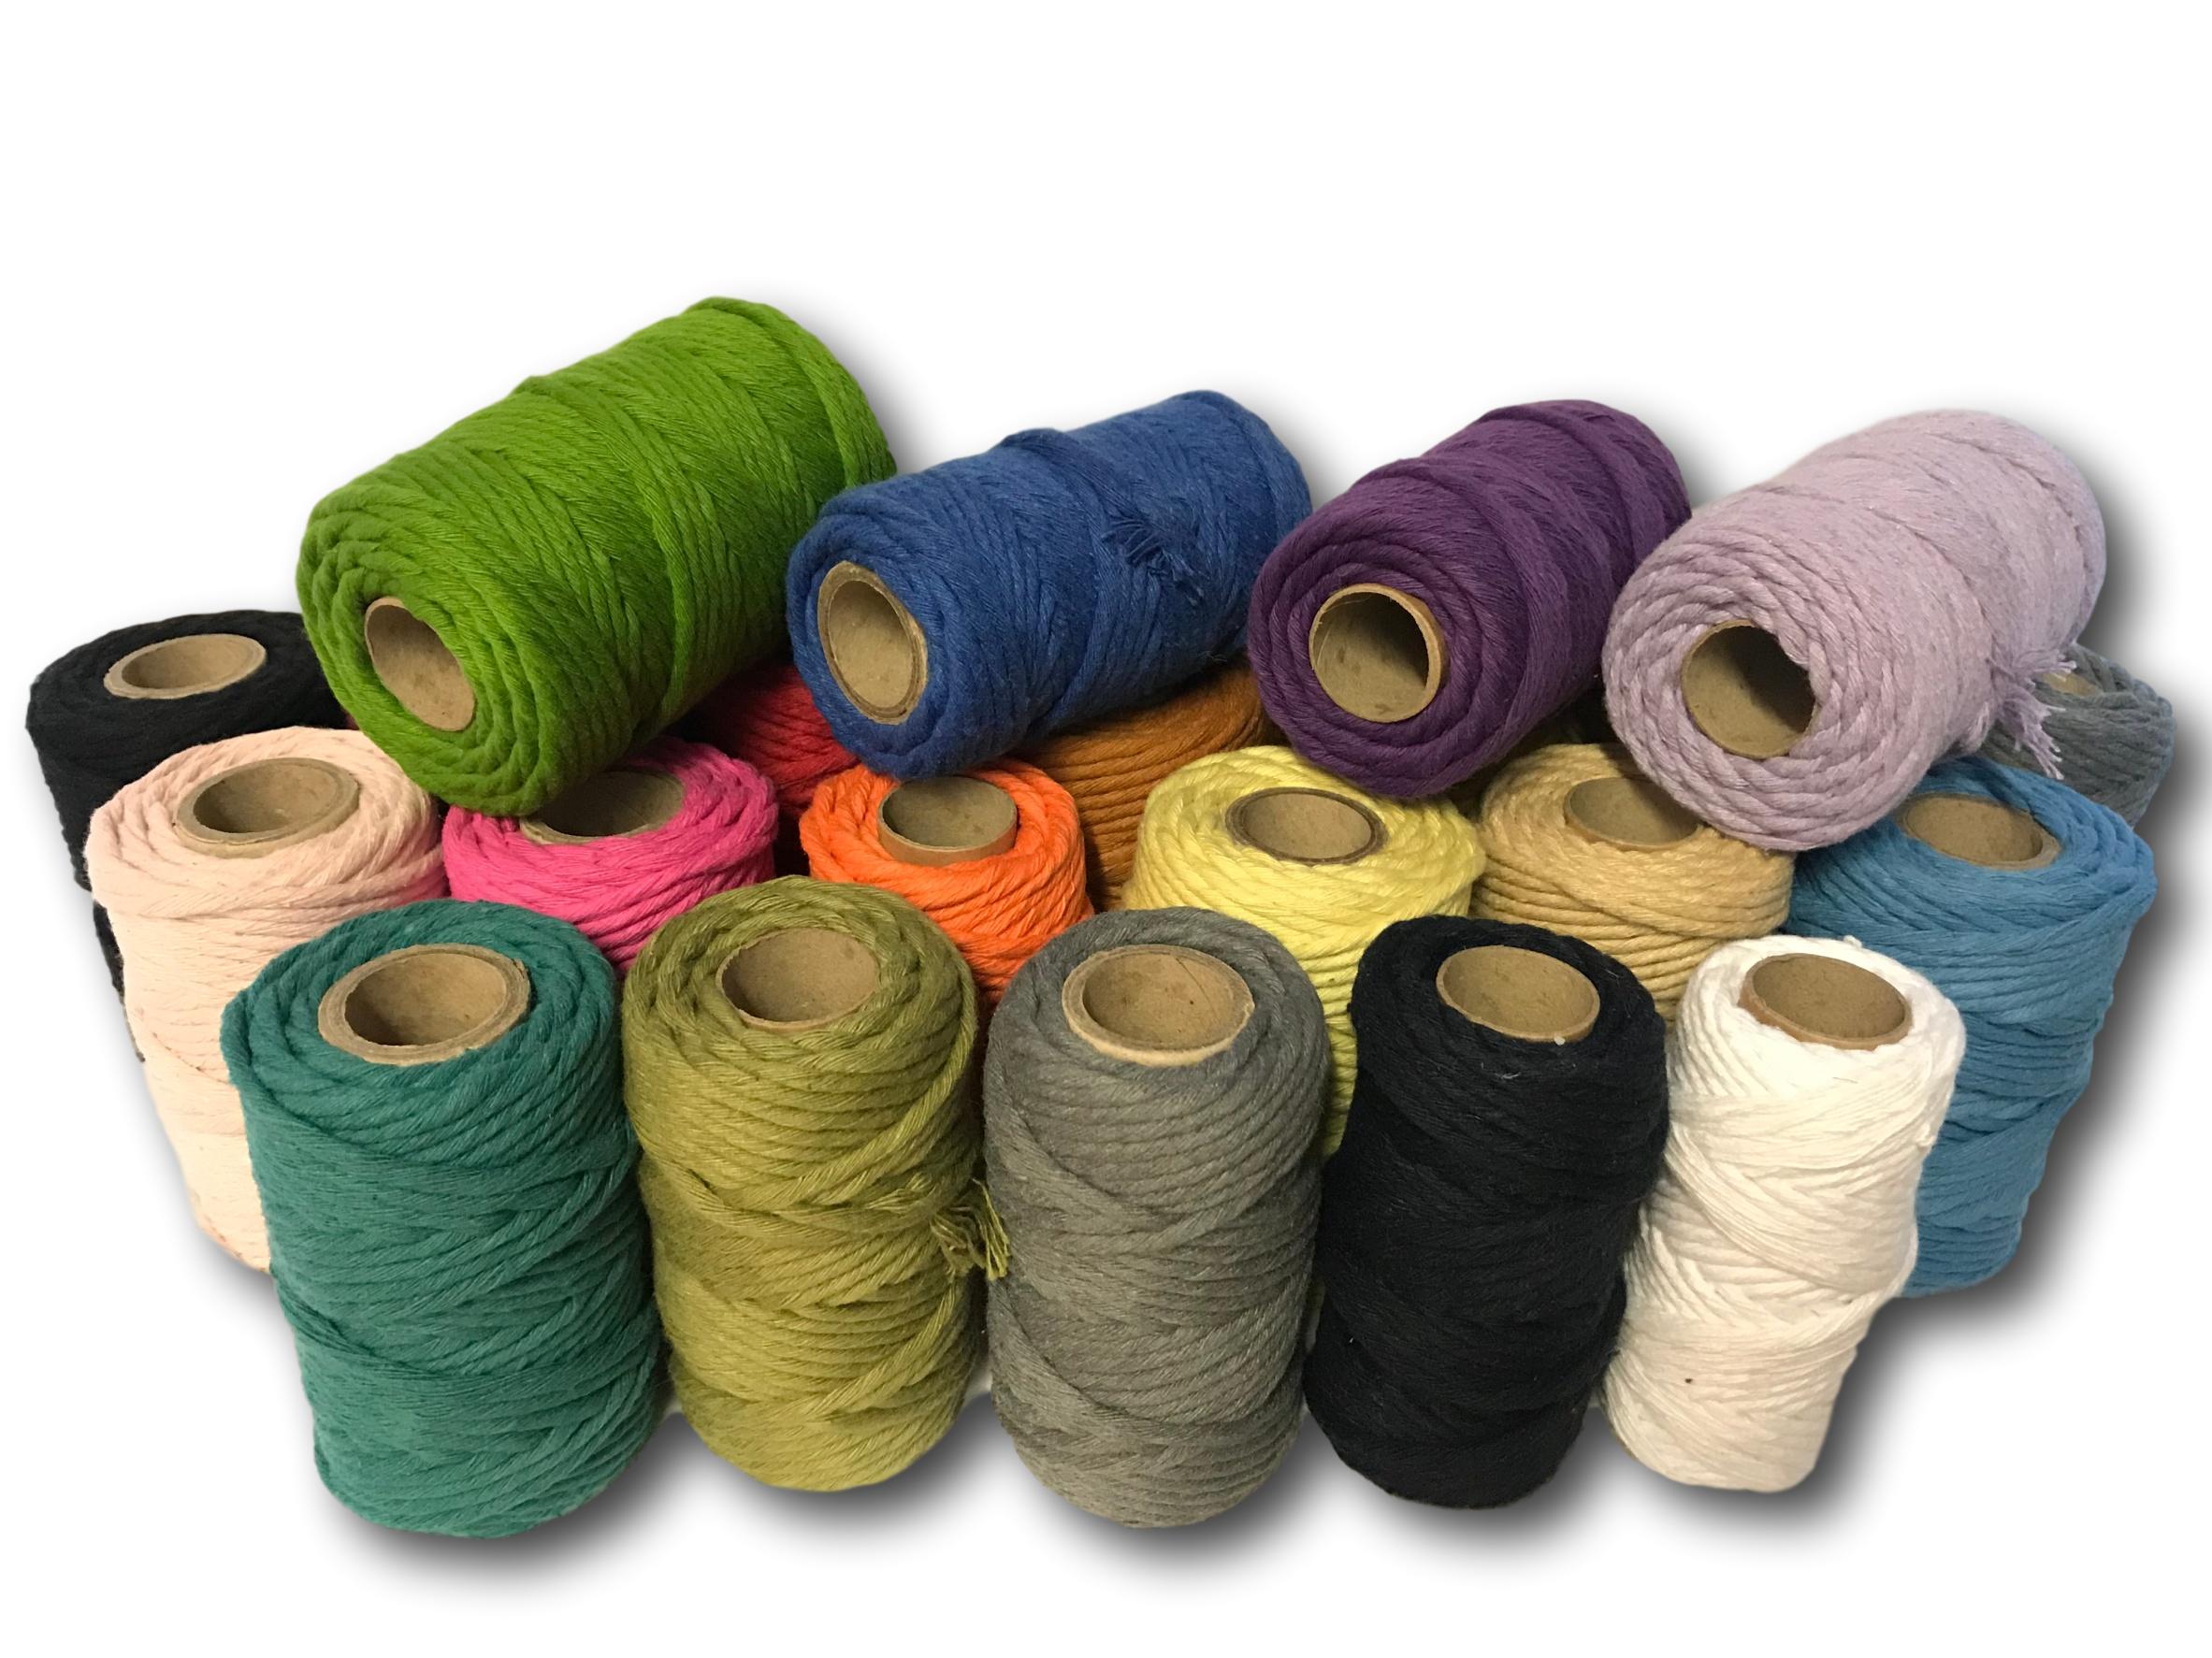
The cord comes in various thicknesses and colours, allowing for a range of creative possibilities. The texture, strength, and flexibility of macrame cord make it ideal for creating intricate, durable, and visually appealing handcrafted pieces.

Want to learn more? Explore our comprehensive guides to explore how ropes are made and the different types of ropes.

Why use macrame cord?

Using macrame cord for your craft projects has a wide range of advantages, including:

1. Strength and durability

Macrame cord is designed to be strong and durable, ensuring that the finished pieces, whether decorative or functional, can hold weight and withstand wear.

2. Flexibility and texture

The cord’s flexibility allows for easy knotting and manipulation, making it possible to create intricate patterns and designs. Its texture adds a natural, tactile quality to the finished product.

3. Variety of sizes and materials

Macrame cord comes in various thicknesses, materials, and colours, allowing for a wide range of creative possibilities, and the ability to match the cord to the specific requirements of a project – whether it needs to be delicate or sturdy.

4. Aesthetic appeal

Natural fibre cords like cotton or jute have a rustic, organic look that enhances the overall aesthetic of macrame creations, making them popular for home decor items.

5. Ease of use

The structure of macrame cord is designed to hold knots well without slipping, making it easier for beginners and experts alike to create consistent and precise designs.

What can you do with macrame cord?

With the right crafty mind, there’s nothing you can’t make with macrame cord. From home decor and practical items to accessories and gifts – the list could be endless. 

Here are our top 30 of the best macrame cord craft ideas:

Home decor

Macrame cord is most known for creating unique and intricate rope home decor items. These could include things such as:

1. Wall hangings

Create intricate and beautiful macrame wall hangings that can add texture and warmth to any room.

2. Plant hangers

Design functional and decorative knotted macrame plant hangers to display your favourite plants inside and outside the home.

3. Curtains

Craft intricate and unique woven curtains for doors, windows, or even as room dividers, using macrame cord. 

4. Dreamcatchers

Make personalised dreamcatchers using threaded and woven macrame cord and beads.

5. Coasters

Create woven macrame coasters for your home that are both decorative and functional.

6. Table runners

Design elegant table runners to elevate your dining experience by weaving macrame cord.

7. Pillows

Make woven and knotted macrame pillow covers for a boho-chic vibe to your home decor.

8. Hammocks

Craft a cosy hammock for indoor or outdoor use, by weaving and knotting strong, durable macrame cord.

9. Shelves

Create hanging shelves using knotted and woven macrame cord to display books, plants, or decor items.

10. Chandeliers

Design unique macrame light fixtures or chandeliers, to add a rustic touch to any room.

11. Key holders

Make decorative wall-mounted key holders with knotted and woven macrame designs.

Fashion and accessories

Ever thought about using macrame cord to make a fashion statement? Here are some fun ways you can incorporate macrame into your DIY wardrobe:

12. Jewellery

Craft necklaces, friendship bracelets, earrings, and anklets using woven macrame techniques.

13. Bags

Design bohemian-style handbags, totes, or clutches by knotting and weaving macrame cord. 

14. Belts

Create fashionable and customisable belts with knotted and woven macrame cord.
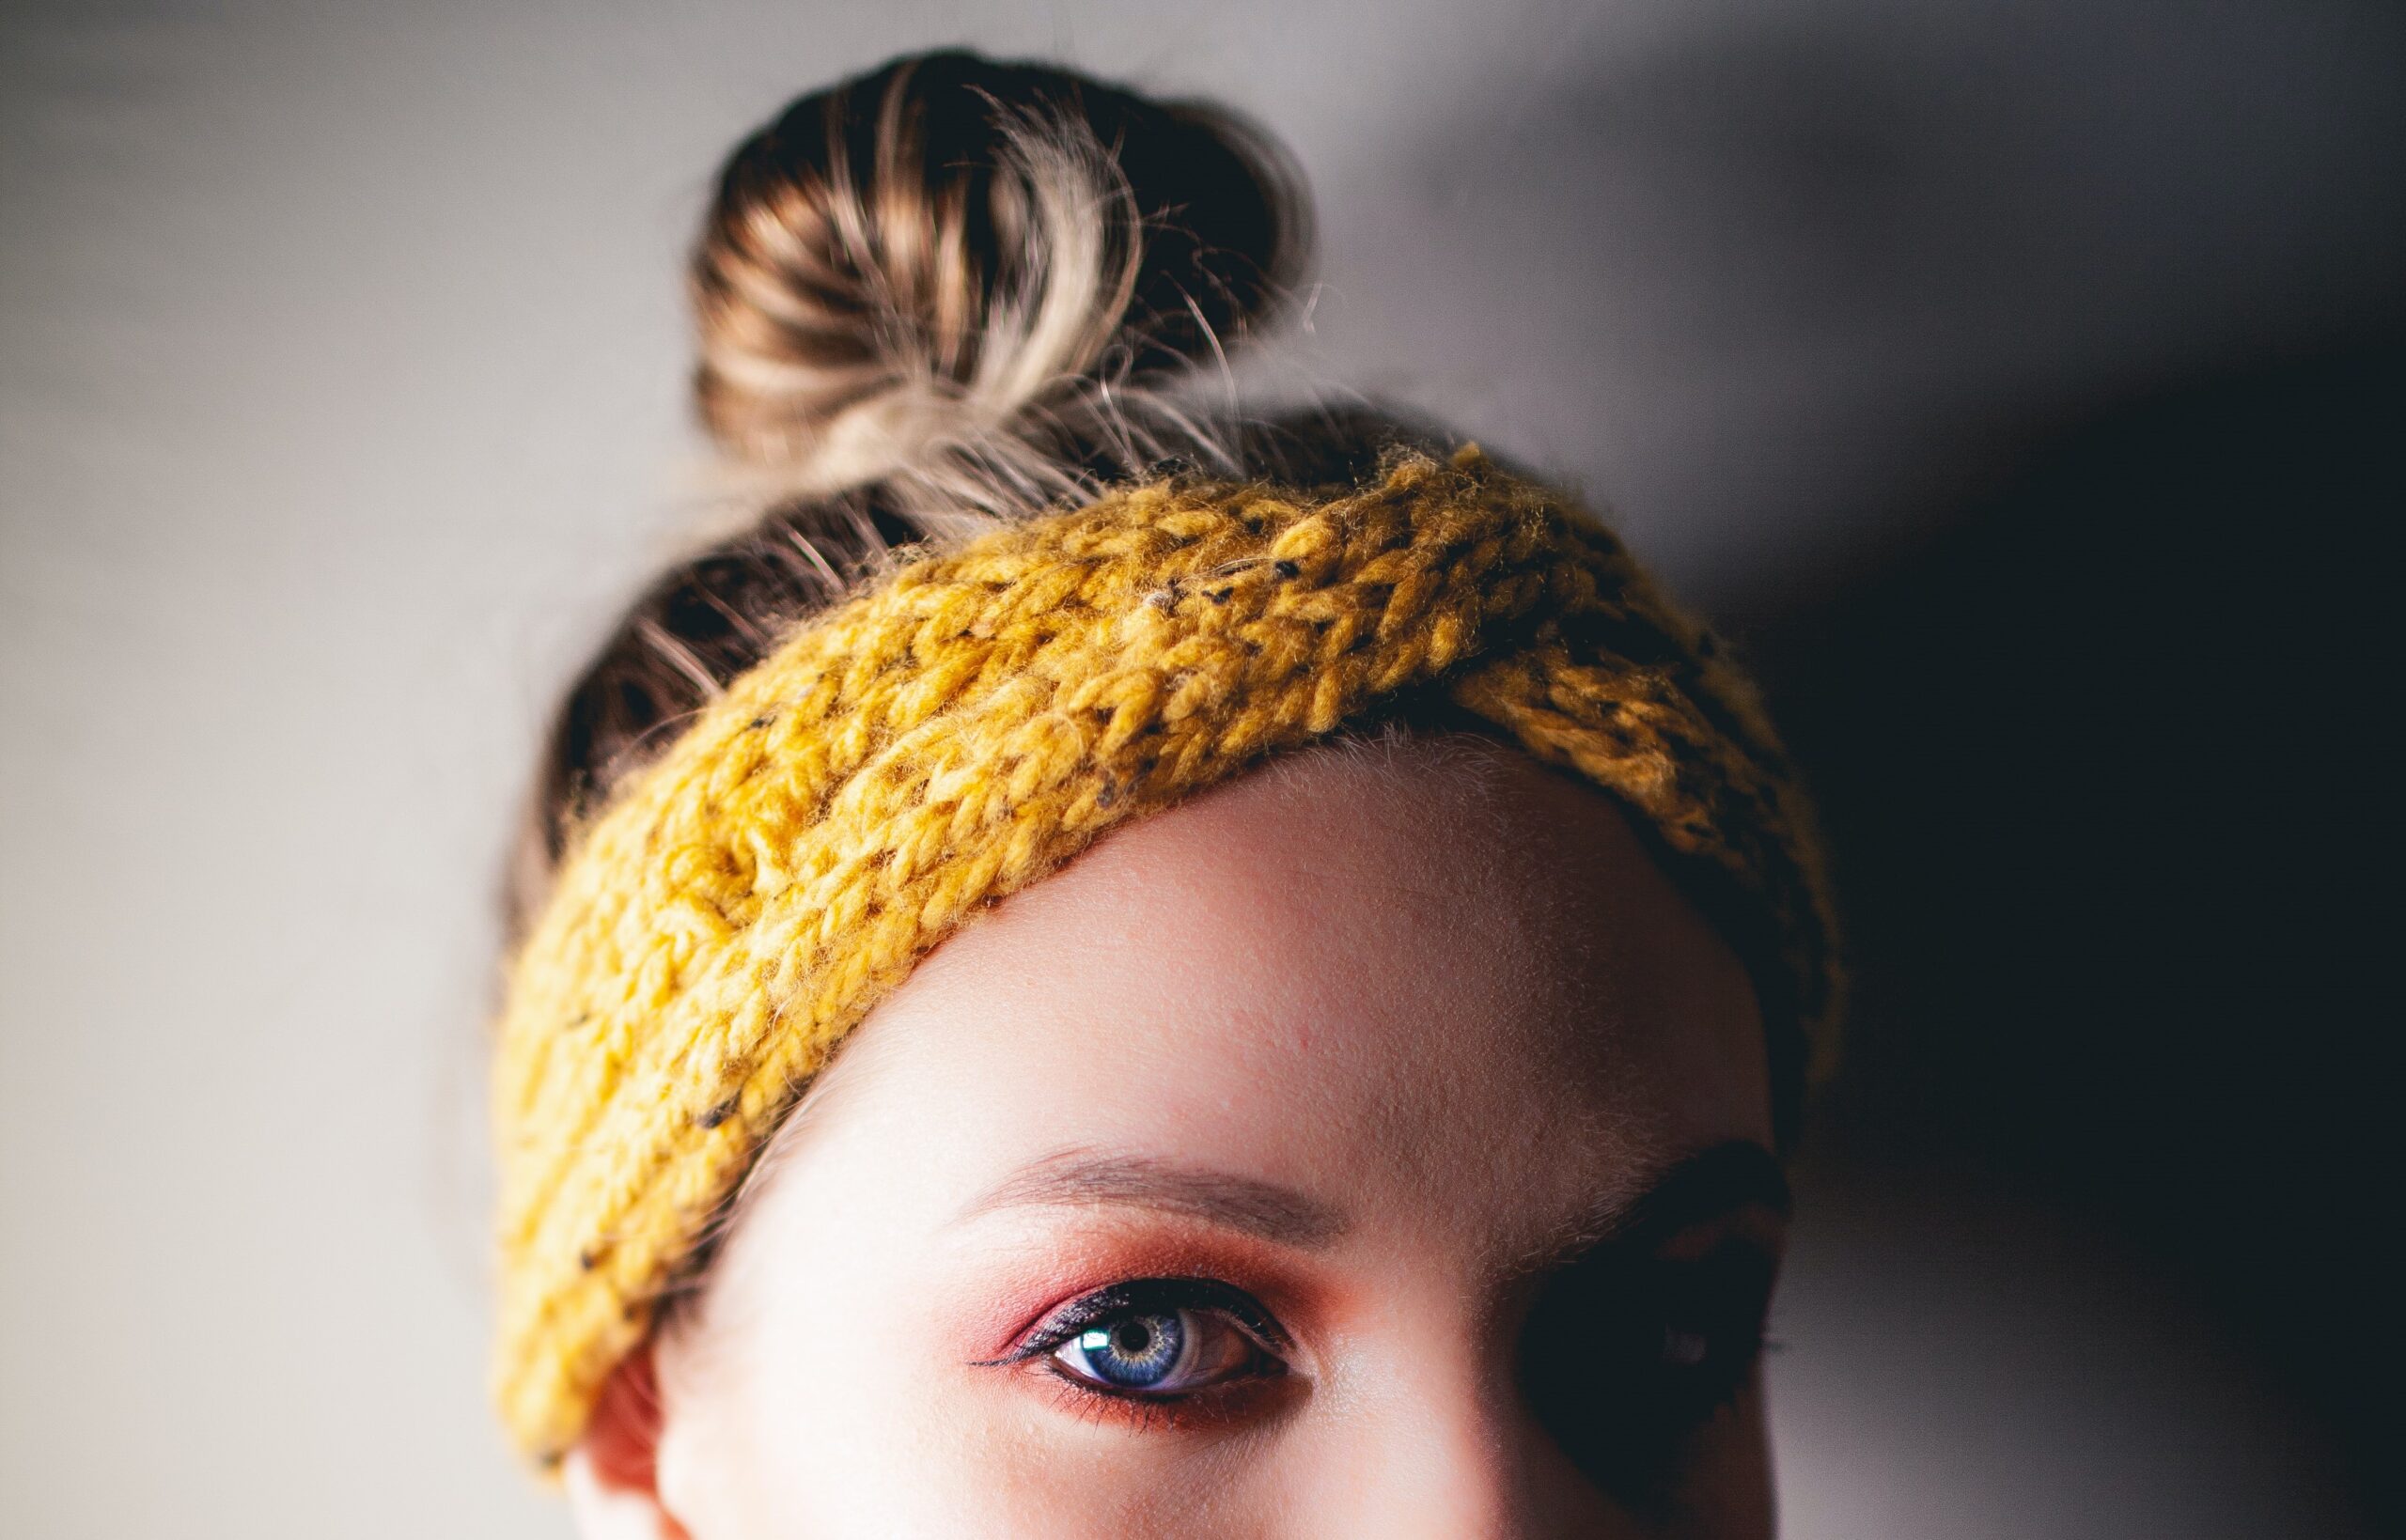
15. Headbands

Make stylish macrame cord headbands that can complement your outfits.

16. Hat bands

Decorate hats with woven macrame bands for a colourful, personalised touch.

17. Sandals

Design unique, woven macrame sandals for a summer look.

18. Watch straps

Customise watch straps with woven macrame patterns, for a trendy, boho style.

Crafts and gifts

If you love to make a handmade gift, macrame cord is one of the best tools to use! You can make a wide variety of DIY gifts, including:

19. Bookmarks

Create intricate, woven macrame cord bookmarks as thoughtful gifts, or for personal use.

20. Keychains

Make small macrame knotted keychains that can be personalised with a wide range of colours and charms.

21. Holiday ornaments

Use macrame cord to craft Christmas and Halloween DIY decorations and ornaments for around the home.

22. Wine bottle covers

Design decorative covers with woven macrame cord for wine bottles – perfect for gifts or table decor.

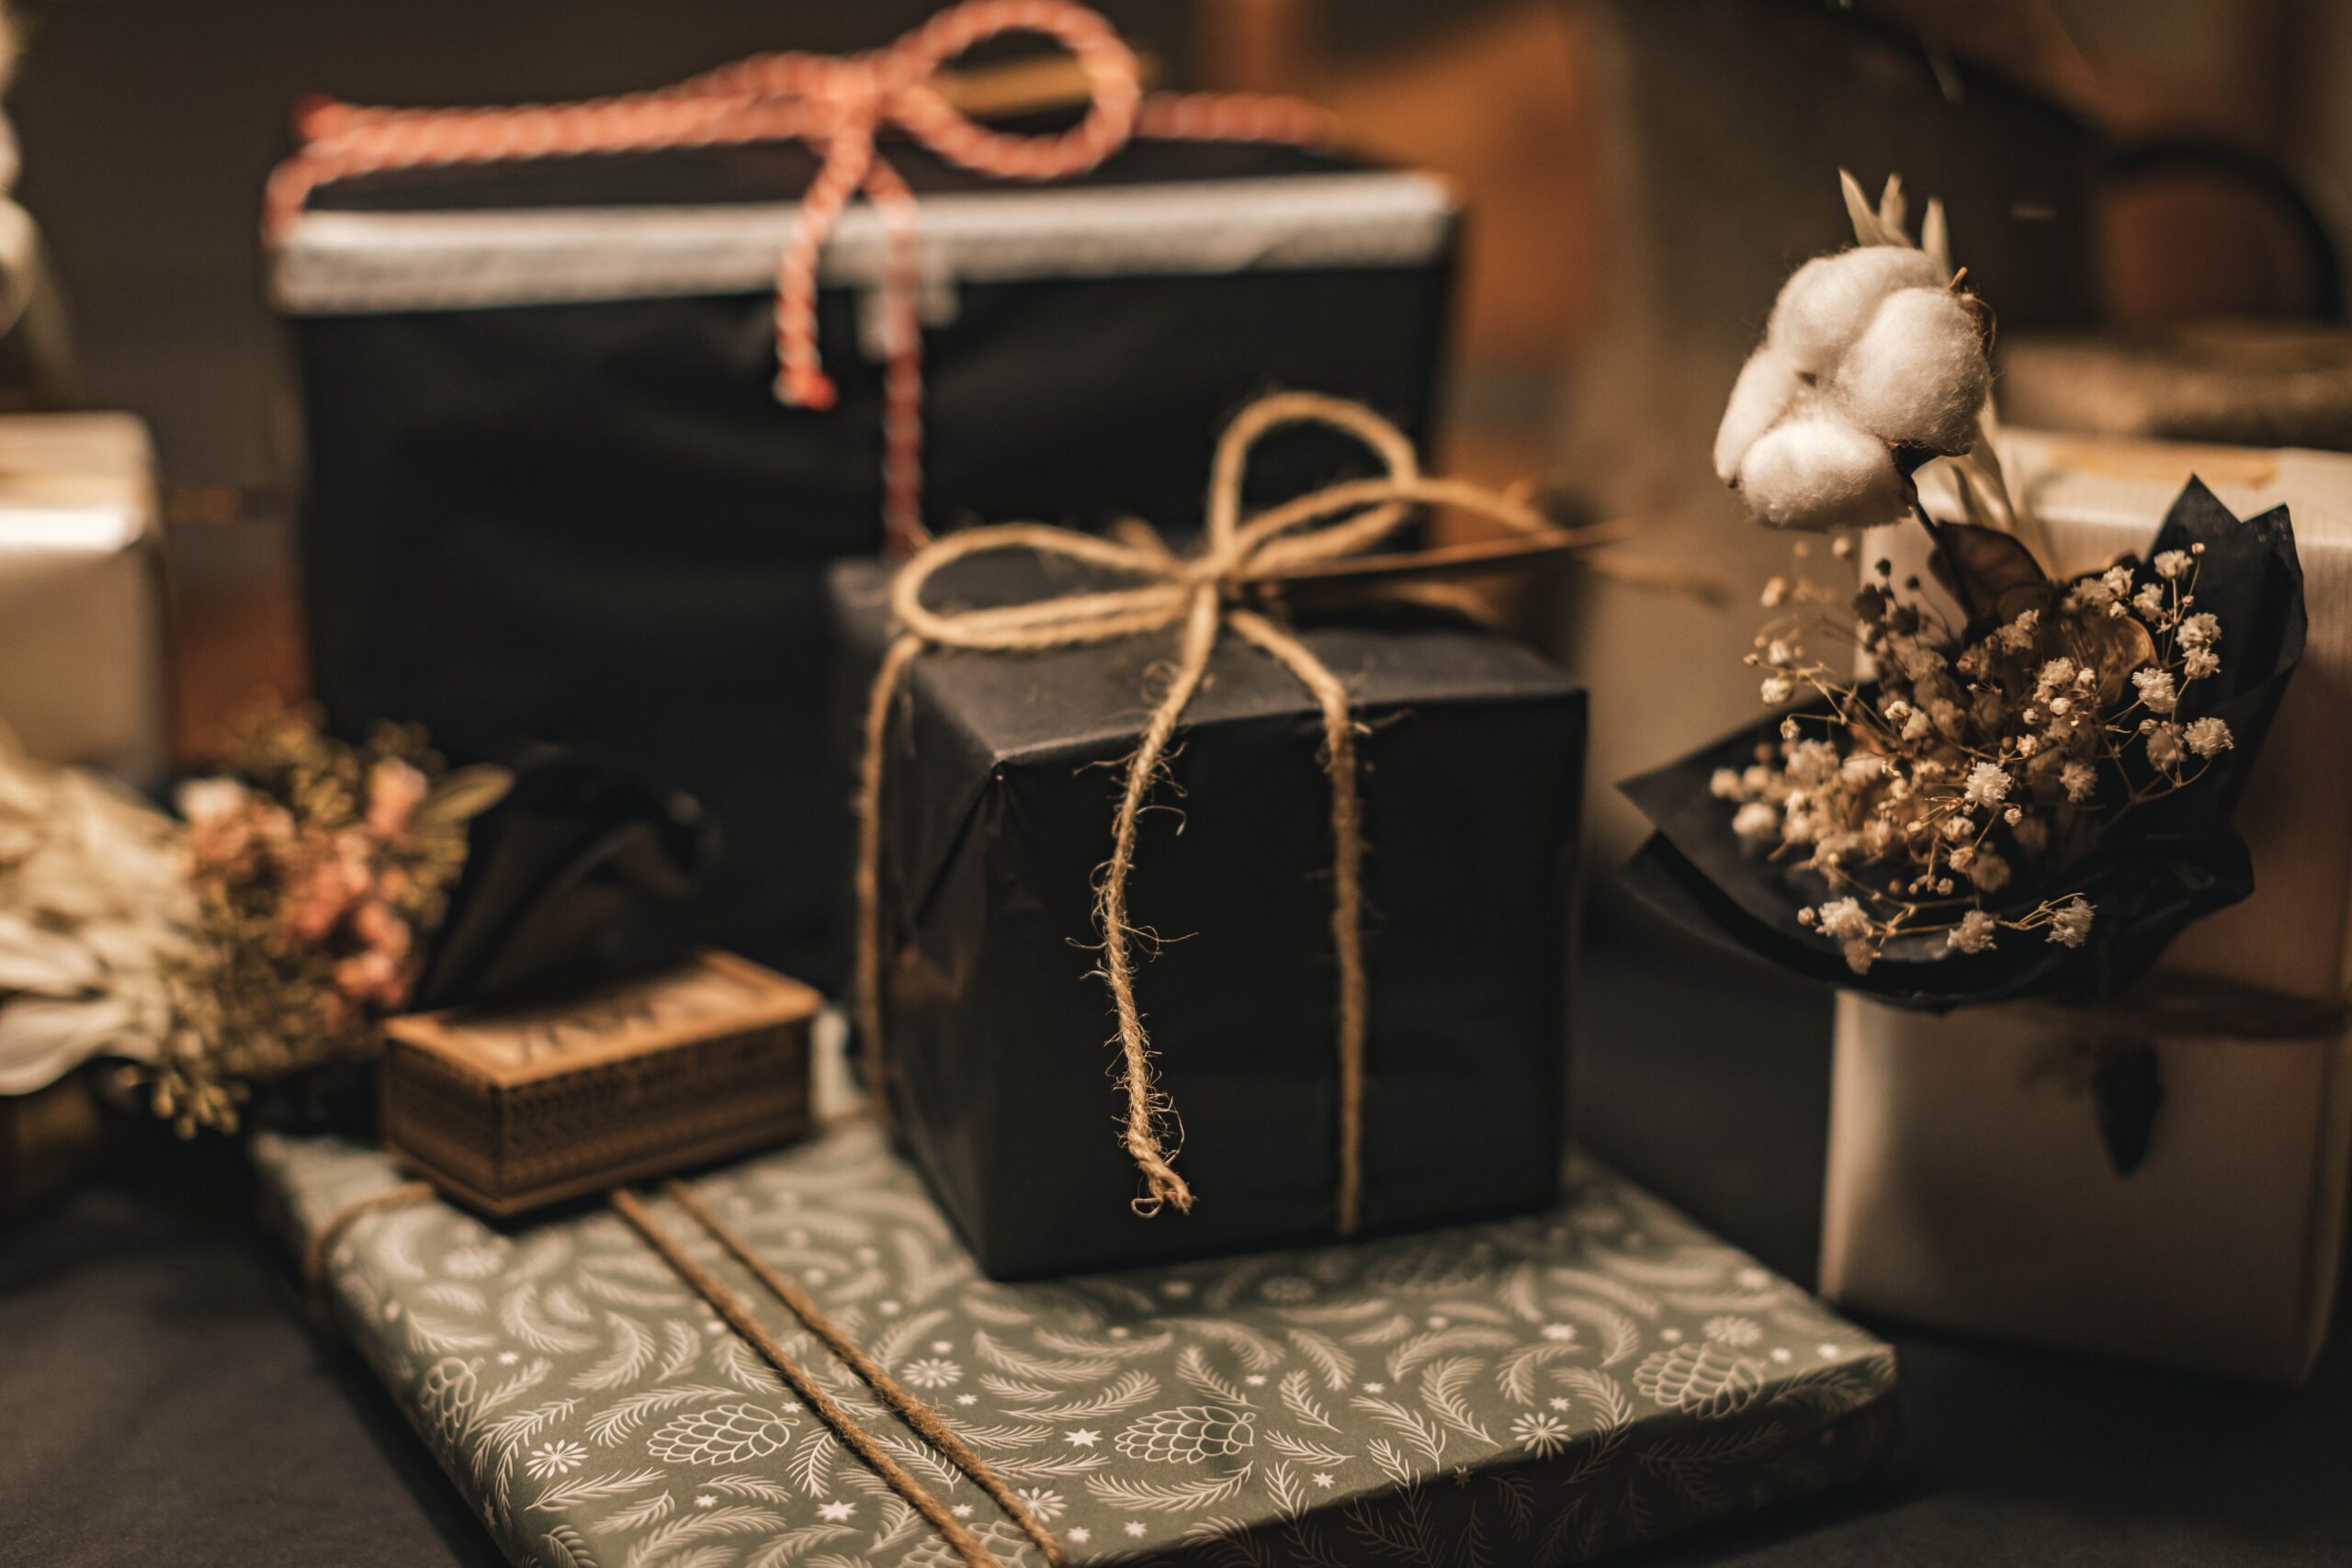
23. Gift wrap decorations

Use natural macrame cord to create unique and personalised embellishments for eco-friendly gift wrapping.

24. Dream jars

Decorate jars with woven macrame covers, turning them into unique lanterns or storage containers – often known as ‘dream jars’.

25. Pet accessories

Make durable and colourful collars, leashes, or toys by knotting and weaving macrame cord – one of the easiest DIY ways to make your home cat friendly (or dog-friendly, if you’re a dog person).

Practical uses

You can also use macrame cord to create a variety of DIY projects with practical uses, including:

26. Tote bags

Create durable and eco-friendly shopping totes by weaving natural fibre macrame cord into intricate designs.

27. Umbrella hanger

Design a hanging storage solution with knotted or woven macrame cord to keep umbrellas off the floor and stored handily by your door.

28. Chair covers

Customise chair backs or seats with intricate macrame cord woven designs.

29. Camera and phone straps

Macrame cord can be woven to make sturdy and stylish straps for cameras or mobile phones.

30. Water bottle holders

Use knotted or woven macrame cord to craft water bottle holders that can be slung over your shoulder for easy carrying.


Want to learn more about all the things you can do with cord or rope? We’re the experts? Head over to our helpful blog to find more DIY craft inspiration, or contact our friendly team today for advice on your next project!

Posted on Leave a comment

How to dye cotton rope naturally

Dyeing cotton rope naturally is a wonderful way to add a personal and eco-friendly touch to your crafting projects. Whether you’re an experienced DIY enthusiast or just starting out, learning to dye cotton rope using natural ingredients is both rewarding and sustainable. 

Unlike synthetic dyes, which can be harmful to the environment and your health, natural dyes offer a safer alternative while producing rich, earthy colours that bring depth and character to your creations. 

Keep reading as we explore the step-by-step process of naturally dyeing cotton rope, from preparing your materials to creating beautiful, dyed rope ready for a variety of creative uses.

What is cotton rope?

Cotton rope is a type of natural rope made from the fibres of the cotton plant. It is soft, flexible, and has a smooth texture, making it comfortable to handle and easy on the hands. Known for its good grip, absorbency, and natural resistance to heat, cotton rope is ideal for a wide range of applications, including crafts, decorative projects, pet toys, and even some household tasks. It is also biodegradable and environmentally friendly, but it is not as strong or durable as synthetic ropes, which makes it better suited for light to moderate tasks rather than heavy-duty use.

Interested to learn how rope is made or about different types of rope? Explore our comprehensive guides for everything you need to know. 

What are natural dyes?

Natural dyes are colourants derived from natural sources, such as plants, minerals, and insects. They have been used for thousands of years to dye textiles, yarns, natural ropes, and other materials. 

Natural dyes are valued for their rich, earthy tones and their ability to create unique, organic colour variations. They are considered environmentally friendly, since they are biodegradable and less toxic compared to synthetic dyes, although they may require more careful handling and preparation to achieve consistent results.

Natural dye colours 

Not sure how to make your natural dye colour? Follow this guide: 

1. Red 

  • Madder root
  • Cochineal
  • Hibiscus flowers
  • Beetroot 
  • Hedge bedstraw root 

2. Orange 

  • Hedge bedstraw root 
  • Onion skins (yellow onions)
  • Gold lichen 
  • Paprika 
  • Carrots 
  • Natural red dye + natural yellow dye

3. Yellow

  • Onion skins (yellow onions)
  • Turmeric
  • Saffron stamens 
  • Marigold flowers
  • Sunflower petals 
  • Dandelion flowers 

4. Green

  • Spinach leaves
  • Nettle
  • Artichokes
  • Peppermint leaves 
  • Fresh cut grass
  • Natural blue dye + natural yellow dye (like turmeric)

5. Blue

  • Indigo
  • Woad
  • Blue iris 
  • Dogwood bark 

6. Purple

  • Logwood
  • Red cabbage
  • Chokeberries 
  • Purple grapes 
  • Blueberries 
  • Blackberries 
  • Natural red dye + natural blue dye 

7. Pink

  • Cherries 
  • Raspberries
  • Dark pink rose flowers
  • Pink camellia flowers
  • Diluted natural red dye 

8. Brown

  • Walnut hulls
  • Acorns
  • Oak bark
  • Coffee
  • Tea

Why use natural dyes over synthetic dyes?

Using natural dyes over synthetic dyes offers several advantages, particularly in terms of environmental impact, health, and aesthetic qualities.

1. Environmental benefits

Natural dyes are biodegradable and generally less harmful to the environment, compared to synthetic dyes – which often contain toxic chemicals that can pollute water sources during manufacturing and dyeing processes. The production of natural dyes also typically has a lower carbon footprint and involves renewable resources.

2. Health and safety

Natural dyes are less likely to cause allergic reactions or skin irritations, making them a safer choice – especially for sensitive individuals and those concerned about exposure to harsh chemicals. This is particularly important in products that come into direct contact with the skin, such as clothing, bedding, and baby products.

3. Aesthetic qualities

Natural dyes produce unique, rich, and often more subtle colours, with a distinct depth and variation that synthetic dyes may not achieve. The colours tend to have an organic, earthy quality and can change or age beautifully over time, giving a sense of character to the dyed materials.

4. Sustainability and tradition

Using natural dyes supports sustainable practices and often ties into traditional, artisanal methods of production that have been passed down through generations. This helps preserve cultural heritage and promotes a connection to natural processes.

5. Non-toxic waste

The waste produced from natural dyeing is typically non-toxic and can often be safely returned to the earth, such as in composting, whereas synthetic dye waste can be hazardous and difficult to manage.

Creative uses for dyed cotton rope

Dyed cotton rope can be used in a variety of creative and decorative projects, such as:

1. Wall hangings and macramé

Dyed cotton rope is perfect for creating intricate macramé rope wall hangings. The colour variations can add depth and interest, making unique, textured art pieces for rope home decor.

2. Coiled baskets and bowls

You can use dyed cotton rope to create coiled baskets or bowls. The different colours can be arranged in patterns or gradients, adding a vibrant touch to storage solutions or table centrepieces.

3. Jewellery and accessory making

Create statement rope headbands, necklaces, friendship bracelets, and earrings using dyed cotton rope. The softness of the rope makes it comfortable to wear, and the colours can be combined for a bold, eye-catching look.

4. Plant hangers

You can use dyed cotton rope to craft colourful plant hangers. The dyed rope can complement the plants and pots, adding a lively accent to indoor or outdoor spaces.

5. Decorative curtain ties

Make custom curtain ties using a dyed cotton rope. Braiding or knotting the rope into intricate designs can add a personal touch to your window treatments.

6. Pet toys

Create fun and safe toys for pets, such as knotted ropes or chew toys, using dyed cotton rope. The colours can make the toys more appealing and easier to find. Just be sure to use natural dye ingredients that are safe and non-toxic to your pets. 

7. Seasonal decorations

Why not use dyed cotton rope for Christmas or Halloween craft ideas? The rope can be twisted, braided, or shaped into festive or seasonal designs.

8. Rug making

Craft a unique, colourful rug by braiding or weaving dyed cotton rope. The natural texture of the rope adds a rustic feel, whilst the colours bring warmth and personality to the space.

9. Handles for bags or baskets

Add dyed cotton rope as handles for handmade bags, totes, or baskets. The dyed rope can add a splash of colour and enhance the overall design.

10. DIY keychains

Make custom keychains using a dyed cotton rope. You can experiment with different knots and colour combinations to create personalised accessories.

How to dye cotton rope naturally

Now that you know what natural materials make which colours, and have some fun and exciting ideas of what to make, it’s time to naturally dye your cotton rope! 

Step 1: Prepare your materials 

First, prepare your materials. These will include: 

  • Cotton rope 
  • Your natural dye materials 
  • Fixatives (such as white vinegar or salt)
  • 2 large pots 
  • Water 
  • Measuring jug and spoons 
  • Gloves 
  • Stirring sticks 
  • Fine mesh sieve or cheesecloth 

Step 2: Prepare your cotton rope 

Once you have all your materials to hand, you need to prepare your cotton rope to be dyed. 

First, prewash the cotton rope to remove any impurities. Then, in a large pot, leave your rope to soak for an hour in your fixative pre-treatment (this is what is going to help the dye adhere to the rope). 

Your fixative should either be, depending on your natural dye material: 

  • Berries – ½ cup of salt to 8 cups of cold water* 
  • Any other natural material – 1 part white vinegar to 4 parts cold water* 

*Remember, this is just a guide. You will need enough fixative solution to fully submerge your rope, so adjust accordingly. 

After an hour, rinse the fixative solution off your cotton rope in cold water. Do not dry the rope – you want to leave it damp. 

Step 3: Prepare your natural dye 

When your cotton rope is at the beginning of its one hour pretreatment, it’s time to prepare your natural dye. 

In another large pot, simmer the natural material in water – you will need double the amount of water as your natural material. Keep it at a low heat for an hour. 

Once the hour is up (most likely just after you’ve finished rising your cotton rope), strain the liquid through a fine mesh sieve or cheesecloth, into your (now empty) first pot. This is the dye. 

Step 4: Dye the cotton rope 

Now that your rope is pre-treated and you’ve created the natural dye, it’s time to dye your cotton rope. 

Place the cotton rope into the pot of dye, ensuring that it is fully submerged. Heat the dye until it is a slow boil, then leave it to simmer for an hour. Remember to stir regularly, to ensure. 

After the hour is up and the colour is as you like, take the pot off the heat and leave the cotton rope in the warm dye liquid for another hour. 

Step 5: Rinse and dry the dyed cotton rope 

After leaving the cotton rope in the warm dye liquid for an hour, using gloves, take the rope out of the rope and rinse with cold water until the water runs clear. 

Once fully rinsed, leave the rope to dry naturally – either on an old towel or to hang dry (with an old towel underneath). 

We’re the experts when it comes to ropes! Head over to our handy blog for more information about all the different things you can do with rope, or contact our friendly team today for advice on your next project!

Posted on Leave a comment

Gift wrapping guide: How to tie a bow with twine

black gift wrapped presents with thin rope and twine wrapped around them on top of a table

Looking for gift wrapping ideas that show someone just how much you care?

Gift wrapping is more than just covering a present – it’s a thoughtful way to elevate the act of giving. A beautifully wrapped gift shows you’ve put in extra effort, making the moment even more special for the person receiving it. 

One of the simplest, yet most charming, ways to finish your wrapping is with a twine bow. Whether you’re aiming for a rustic, natural look or something more festive, twine adds a timeless and classic touch to your present.

In this guide, we’ll walk you through how to tie a bow with twine, starting from the basics of wrapping a gift to crafting the perfect bow. Let’s get started!

What do you need to wrap a present?

Before you jump straight into wrapping your gifts, it’s handy to have everything you need prepared and at the ready. This includes: 

  • Twine 
  • Scissors
  • Wrapping paper 
  • Clear tape
  • Gift tags or other decorative items

How to wrap a present

Presentation is key when giving a gift, as a rushed job or messy finish could make it look like you haven’t put any effort in. However, it’s time we admit that wrapping gifts is often harder than it looks. 

But fear not! This season of giving, we’ve broken down how to wrap a present in just three easy-to-follow steps:

Step 1: Choose your wrapping paper

The first step in wrapping a present is choosing your wrapping paper. When wrapping gifts with twine, brown paper is often the favoured choice, as it gives a more rustic, classic finish. However, that doesn’t mean it’s the only option. 

Select a wrapping paper that suits the occasion, the gift-receiver, your gift, or simply just what you have on hand. Remember that as long as it’s wrapped well, and it all comes together in the end with your choice of twine, it doesn’t really matter. 

Step 2: Measure and cut the paper

Once you have your wrapping paper to hand, it’s time to measure and cut it. 

Place the gift in the centre of the paper, and roll it over all sides to measure how much paper you’ll need to cover it. Now you know how much paper you’ll need, allow a little extra around the edges for folding, and cut the paper to size. 

Step 3: Wrap the gift

And now to the final step – actually wrapping the gift!

Place the gift face down on the wrapping paper and fold one side of the paper over it, securing it with a small piece of clear tape. Then, fold the opposite side of the paper over, pulling it snug against the present, and tape it down. 

Next, for each loose end, fold each corner inwards towards the gift, to create a triangular flap on each side of the gift. If you’re taking it slowly, you can tape the two corners together, to prevent the triangle from unfolding. 

Finally, fold the triangular flaps up towards the present and tape the top corner of each triangle onto the gift. Turn the gift upside down and voila – a perfectly wrapped present!   

How to tie a twine bow on a present

Whilst you could just leave it there with your gift wrapping, nothing says “look at how much effort I put in” quite like finishing it with a twine bow. 

Whilst this may seem quite fiddly, the end result surely makes it up for it! Here’s a quick step-by-step guide to tying a twine bow on a present:

Step 1: Select your twine 

When it comes to picking twine for gift wrapping, there really isn’t a wrong option (quite like when picking your wrapping paper). However, you do want your twine to look cohesive with your wrapping paper. 

If you opted for the classic brown paper, then you could stick with the rustic theme by choosing natural jute twine. Or, you could add a pop of colour with some seasonal Christmas twine or shiny and decorative ribbon twine

Whatever twine you choose, remember to pick a colour or pattern that both matches the aesthetic of your wrapping paper, but also doesn’t blend in with it. 

Step 2: Cut the twine

Now that you’ve chosen your twine, you need to cut it to length. 

Measure around three times the width, and then cut the twine to that length. Remember that you can always trim the twine later if needed, but you can’t add more on. 

Step 3: Wrap the twine

Once your twine is cut, it’s time to wrap it onto the gift. 

Place the centre of the twine on top of the present. Wrap it around the front of the gift, cross it at the back and wrap it back around. 

Step 3: Tie a basic knot

Then you need to secure the knot in place. 

Once the twine is wrapped around the gift and back at the front, tie a simple knot to secure it. 

Step 4: Create the bow

Finally, it’s time to create the bow you’ve been working towards. 

This is done the same way as tying your shoes. Make two loops, like bunny ears, with the wine. Then, cross one loop over the other and tuck it beneath. Pull both loops to tighten the bow. 

Fluff the loops to your desired shape and size, and trim the ends of the twine if they’re too long or uneven

Step 5: Add final touches

After you’ve finished wrapping your present with a twine bow, you can add some finishing touches. This is completely optional, but it adds a unique, personal touch to your gift. 

Here you could attach a gift tag with a heartfelt message, along with your name and the recipient’s, or you could add other decorative elements, such as tucking springs of greenery or flowers underneath the time and onto the present. 

Frequently asked questions 

What is the best twine to use for gift wrapping? 

There are no rules when it comes to choosing which twine to use for gift wrapping. From bakers twine and garden twine to craft twine, the choice is completely yours – there is no “best twine” to use. 

How can you prevent a twine bow from coming loose? 

If you’re concerned about your twine bow coming loose, then we recommend double-knotting as you go. With the first simple knot, tie it twice, and do the same for the bow knot. 

What can I use instead of twine for gift wrapping?

If you don’t have twine for gift wrapping, fear not – there are other options available. Ribbon is a common substitute for twine gift wrapping, especially during the festive period, but you could also use other things such as fabric or just some household cotton string

What other things can you use twine for?

Twine has a wide range of uses, from tying up meat for cooking to supporting the plants in your garden – it doesn’t always have to be crafty! We have a wide range of blog posts on uses for different types of twines, such as what is flax twine and what can it be used for and 8 amazing ideas for jute twine crafts

Gift wrapping is just the tip of the iceberg when it comes to all the different things you can do with twine! Explore our blog for more insights into twine crafts, or contact our helpful team today for advice on what twine to use for your next project.

Posted on Leave a comment

14 ingenious paracord projects for survival

paracord material projects

Originally used by the military, paracord has now become a staple item for adrenaline junkies and crafters alike. Thanks to its extreme strength and durability, paracord is the go-to item for intensive applications like bungee jumping, rock climbing and securing heavy cargo. But since it’s also extremely lightweight and flexible, paracord can be used for a wide range of other applications, including the creation of intricate, decorative items like coasters, bracelets and keychains. 

Over the past few years, paracord projects – the creation of items using paracord – have become extremely popular. Not only are these items attractive and fun to make, but they can also be very useful for those who need durable, lightweight items, such as hikers and campers. Keep reading to learn more about paracord and discover a plethora of paracord project ideas to aid survival in the great outdoors.

What is paracord?

Paracord or parachute cord was originally used by the military in the suspension lines of parachutes, and it has also been used by astronauts on space missions. These synthetic, 100% nylon cords are extremely durable and flexible, and they contain an interior core protected by a woven exterior sheath to optimise tensile strength. In fact, type-III paracord is sometimes referred to as 550 cord because it has a breaking load of 550 lbs (249.5 kg) – this makes paracord ideal for even the most heavy-duty applications!

Despite initially being used by the military and government agencies, paracord can now be bought and used by the general public as a multi-purpose utility cord. Paracord is particularly popular among those who are fond of hiking, camping, adventuring and extreme sports, but in recent years, paracord projects have become a craze among arts and crafts enthusiasts, who use this flexible, durable cord to create useful or decorative items with intricate woven designs. 

What are the benefits of using paracord for craft projects?

Not only is paracord extremely strong, making it ideal for outdoor, heavy-duty applications, but it’s also highly flexible and somewhat elastic thanks to its 100% nylon material. This means it can be easily manipulated and woven into intricate patterns, so it can also be used as a decorative item.

Crafting enthusiasts also love paracord because it comes in plenty of colours and styles, and even neon and multicoloured options. As a result, paracord can be used to create beautiful, unique jewellery and other accessories, in addition to household objects like coasters, dog collars and children’s toys. Plus, once the project is complete, you won’t have to worry about the item becoming ruined because paracord is very durable and waterproof.

What tools do I need?

Creating paracord projects can come with a bit of a learning curve, but as you practise and get to grips with handling the material, you’ll soon learn how to create more complex and interesting designs.

However, as a beginner, there are just a few things you need. Scissors and needle-nose pliers are essential for manipulating and cutting the strands, and we would also recommend using a tape measure so you can be precise with your measurements. You also need a lighter or match to seal the ends of the cords when you’ve finished cutting them – this will prevent the paracord from fraying.

14 creative paracord survival projects

Ready to don your hiking gear? These paracord survival projects are essential for keeping you safe in the great outdoors without weighing you down. Bring your love of adventure and your love of arts and crafts together with these paracord project ideas:

1. Survival bracelet

One of the most important paracord projects you can learn is creating a survival bracelet. Not only is a woven paracord bracelet a fashion statement – especially if you weave multiple colours together – but this item can also provide much-needed help if you suddenly need a rope while you’re away from civilisation. For example, you could fix a belt or another item of clothing, tie a strong survival knot, secure heavy items, moor a boat or aid a water rescue. 

A survival bracelet is made out of several feet of paracord that’s woven tightly together so it can be worn around the wrist. In an emergency situation, you can unravel your survival bracelet to get a useful length of rope for a wide variety of purposes.

2. Paracord belt

Similarly, you could create a paracord belt if you like the idea of wearing a compact length of paracord that can be unravelled if needed. Plus, even if you never unravel your paracord belt, it can still be an extremely useful accessory. By adding carabiner clips to your paracord belt, you can attach multiple items to your belt to free your hands, such as a water bottle holder or keychain (which can also be made from paracord for extra durability and flexibility). Since paracord is so strong, you don’t have to worry about whether your belt can handle the weight of any items you attach to it.

3. Drawstring bag

Has your backpack ever broken halfway through a hike or camping trip? You won’t have to worry about this unfortunate event occurring if you create your own paracord drawstring bag. Drawstring bags are an extremely efficient way to carry your belongings. Plus, since paracord is so lightweight, this bag won’t put as much strain on your back while walking.

4. Lanyard

By keeping your hands free as you walk, you’ll find it much easier to grab items as you need them or stabilise yourself on uneven surfaces. So, if you have any small items you need to keep on your person (such as a paracord tin pouch – see below), it’s a good idea to create your own lanyard out of durable paracord material. Simply add a carabiner clip to the end of your lanyard and attach your essential items. This means you won’t ever forget your most important items while out in the wilderness.

5. Paracord tin pouch

As mentioned above, it’s a good idea to keep small, essential items around your neck on a lanyard rather than in your hands or at the bottom of your bag. Therefore, you can easily grab what you need and never worry about accidentally misplacing something.

By creating a small paracord tin pouch, you can store items like medication, first aid supplies, a lighter or a small knife in a handy tin. This tin can then be slotted into the tin pouch and attached to your paracord belt or lanyard with a clip. Alternatively, you could use this paracord project as a phone pouch for keeping your phone safe and out of your hands or pockets.

6. Water bottle holder

Another thing you can attach to your paracord belt (or drawstring bag) is a paracord water bottle holder. It’s essential that you alway carry a bottle of water with you when hiking or camping. Keep your water bottle safe and easily accessible with a lightweight water bottle holder made from criss-crossed strips of paracord. You can either create a paracord handle or clip the bottle holder to your belt with a carabiner.

7. Bottle and knife wraps

Another bottle accessory you may need is a paracord bottle wrap. This is a much more tightly woven paracord item that fully encases your bottle or flask, providing an insulating layer. So, if you’re going for a long hike and want to keep your flask of soup or coffee warm for hours, creating a paracord bottle wrap is a great idea.

8. Hiking stick and knife wraps

These paracord wraps aren’t only good for keeping your drinks warm. Thanks to the moisture and sweat-wicking properties of nylon, paracord is a great item to wrap around handles, such as knife handles, to improve your grip. If you like to use a hiking stick to help you walk, you could wrap some paracord around your hiking stick to make your grip more comfortable.

9. Sleeping bag compression strap

Sleeping bags can be a pain to carry around, especially if they no longer fit easily in their bags or the straps have broken. Luckily, if you’re a creative person, you can make your own compression strap for carrying around your sleeping bag or pillows more efficiently. Remember to create some handles too so you can carry your sleeping bag or wear it on your back.

10. Hammock

Got no tent? If you’d rather sleep under an open night sky, a woven paracord hammock could be the perfect camping item for you. Paracord is extremely strong and has a breaking load of 550 lbs, so you can rest assured that your hammock will easily support you throughout the night. During the day, you can neatly pack up your paracord hammock and store it in your paracord drawstring bag.

11. Survival keychain

Another item you can clip onto your paracord belt or bag is a paracord keychain. Keep your keys safe with this durable, lightweight keychain, or attach useful survival items to it like a mini torch or a keychain pocket knife. Plus, by using bright or multi-coloured paracord, you can ensure that you never misplace your keys again!

12. Fishing lines

If you ever find yourself in a desperate situation where you need to find food in the wilderness – or you just fancy a bit of fishing – it’s good to know that you can repurpose your paracord as a fishing line. All you have to do is remove the yarns of the core of the rope and use these thinner threads as fishing lines. Plus, if you ever need to repair your gear but you didn’t bring a sewing kit, you could use the yarn in the core of the paracord as sewing thread.

13. Paracord sling

Another tip for those who need to hunt for their food is to create a paracord rock sling. Use a weaving pattern for the pouch part of the string, which is where you place your projectile, and then use thin ropes for the cords and handles on either side. Since paracord is very flexible and elastic, it can make a very strong weapon if needed.

14. Dog leash

Finally, if you’d love to bring your furry friend with you on your adventures, you can create a simple yet elegant dog leash with paracord. This strong material will ensure that your dog can’t break away from you and get lost, and since you only need to use a simple braiding method, this item is easy for a beginner to make. Adorn your leash with bright colours or multi-coloured patterns, or make a matching dog collar to complete the set.

Frequently asked questions about paracord projects for survival

What is paracord good for in survival?

Paracord is an excellent and versatile survival tool. With paracord, you can create a wide variety of survival tools, such as bags, belts and hammocks, and also use it to secure cargo, fix broken items and climb steep rock faces. Plus, in an emergency, you can use paracord as a tourniquet, as part of a sling for an injured arm, or you can remove the inner yarn to collect finer strings for fishing lines or sewing thread.

What are some cool ideas with paracord?

In addition to being a great survival tool, paracord is extremely popular among arts and crafts enthusiasts due to its strength and flexibility. Using multiple colours and weaving patterns, you can create items like children’s toys, necklaces and bracelets, dog collars and toys, coasters, keychains and much more!

Can you make money with paracord?

Paracord projects could just be a fun hobby in your spare time, but as you get better at manipulating these ropes, there could be an opportunity for you to make some money. If you think people will enjoy your paracord designs, why not sell them online for some extra cash? 

Can paracord hold a human?

Paracord has a breaking load or breaking strength of up to 550 lbs, which means it can definitely hold a human if the body is supported correctly. Therefore, if you create a paracord hammock with doubled-up strands and a strong criss-crossed pattern, this should hold you comfortably throughout the night.

Why wear a paracord bracelet?

Paracord bracelets or survival bracelets are very popular among hikers and outdoor sports enthusiasts. In addition to being a fun accessory, these bracelets can be unravelled if needed, revealing a long length of paracord that can be used to tie knots, secure heavy items or participate in a rescue. If you’re heading out into the wilderness, we would definitely recommend wearing a paracord bracelet just in case you need it.

Can you get paracord wet?

Paracord is waterproof, but you shouldn’t submerge it in water for long periods of time. The fibres can weaken and shrink if they’re exposed to moisture for too long, and the shrinkage can get worse if you use heat to dry the paracord instead of letting it air-dry. Paracord can withstand splashes of water and short-term water exposure, but try not to keep it in moisture for too long.

Why do you burn the ends of paracord?

During paracord projects, you’ll have to cut your strips of paracord down to size. Whenever you cut paracord, you should burn the end of the cord to seal it – which you can do with one of our hot knife rope cutter sealers. This prevents the paracord from fraying and weakening because the nylon fibres will melt and fuse together.

Are you planning your own creative paracord projects, or are you an adrenaline junkie looking for your next survival tools? Whatever you’re planning for your paracord projects, we’ve got the paracord resources you need here at Rope Source. Browse our wide range of colourful paracords, check out our helpful blog, or contact us today for a speedy answer to any of your paracord questions.

Posted on Leave a comment

How to make a rope headband

rope headband diy

Want a stylish new accessory without breaking the bank? Unleash your inner boho vibes with a handmade rope headband! Using any ropes or twines you may have left over, you can craft a custom headband that’s cheap, quick and easy to make. Plus, it makes the perfect handmade gift for your fashion-loving friends. Continue reading to find out how to make a rope headband in just a few simple steps.

How to make a rope headband

Learn how to make a rope headband that will look great with any outfit. Grab your materials and follow the straightforward instructions below.

What you need to make a rope headband

1. Choose your rope

First and foremost, you’ll need to choose your rope of choice. There are so many different styles, thicknesses and colours of rope, so you can customise your rope headband to suit you. Try a soft cotton braided rope for a thick and comfortable headband, or use some chunky bakers twine for a slightly thinner band. If you want to get fancy with your rope headband, try some metallic or sparkle bakers twine. You’ll be sure to catch eyes in a shiny new headband!

2. Create a knot in the rope

Leaving around 8-10 inches on one side of the rope, begin creating a figure-8 knot. We’ll run through the steps below.

  • Create a loop with the rope, leaving 8-10 inches to the side of the rope
  • Pass the end of the rope underneath, creating a figure-8 shape
  • Bring the rope end through the top loop, completing the 8

Take care not to pull the knot too tight, as you will need to thread a second rope through this knot.

3. Repeat the same with the second rope

With your second strand of rope, match the original figure-8 shape. Simply pull your second rope through one of the loops and follow the knot around so the two ropes intertwine. You should now have the two ropes joined together by the figure-8 knot. Squeeze both ends of the rope so that they are tight enough not to fall apart. 

4. Cut the ropes to size

Measure the rope headband against your head, with the knot positioned where you would like it to sit. Mark the areas where you’ll need to trim the rope. Then, arrange your headband into a loop, and position your hair bobble where you would like the rope ends to meet. Take away the length of the hair bobble from your rope and then trim them to size. If you are using synthetic rope, a hot knife rope cutter will seal your rope ends with heat and ensure they don’t fray, leaving you with a durable headband. However, if you are using natural rope to craft your headband, you should not use a hot knife – opt for scissors or a sharp craft knife instead. 

5. Attach the hair bobble

Using your hot glue gun, attach each end of the rope headband to opposite sides of the hair bobble. If you are using a thinner rope or twine, you could also tie the rope to the hair bobble for extra strength. Let the glue completely dry before you wear the headband – you don’t want to end up with glue stuck in your hair!

6. Style and wear your new rope headband

With your new rope headband freshly crafted, all that’s left to do is choose the perfect outfit to wear with your headband. If you want another matching accessory, find out how to make a friendship bracelet that you and your friends can wear alongside your rope headbands. 

Ropes can be used for all sorts of crafts; just take a look at our rope decor ideas for your next home DIY project. But the fun doesn’t end there, with countless ideas such as a rope picture frame and other uses for decorative rope.

Posted on Leave a comment

Rope decor ideas for your next home DIY project

spools of colourful rope perfect for rope home decoration

Are you looking to spruce up your home with some DIY projects? Why not try out some of our creative rope decor ideas? Rope decoration is a fantastic way to add a touch of rustic or nautical charm to your living space. Learn how to use rope for crafting, and be inspired by some charming crafts that you didn’t know were possible to make with rope. Before you get started, be sure to read our guide to different rope types and their strength, to ensure you select the most suitable rope for your needs. Here are our top four rope decor ideas to inspire your next home DIY project.

1. Hanging rope mirror frame

A nautical rope hanging mirror frame can add a touch of beachy style to your home. You can easily create one with some coiled rope, a hot glue gun, and a circular mirror to start with. To stop the rope from fraying, you’ll need to use the right tools. We recommend using a hot knife rope cutter sealer paired with hot glue to ensure that your rope ends don’t fray, guaranteeing that your nautical rope mirror will last for many years to come! Follow these steps to craft your own rope mirror as the first of our exciting rope decor ideas:

1. Choose your rope

Like with most home DIY projects, this hanging rope mirror frame is fully customisable to your desired finished product. The type of rope you choose for this rope decor idea can completely transform how your rope mirror looks. For example, opting for a decking rope or natural rope will help you to keep a nautical theme. Making a mirror with these ropes can perfectly complement our other simple nautical home decor ideas. Alternatively, you could choose a bright decorative braid for a rope mirror that adds a unique pop of colour to your home.

2. Arrange the rope on your mirror

With your rope of choice, create coils around the border of the mirror. Start with one on the outer edge and work your way in, taping the ends down as you go. The number of coils you choose depends on the size of your rope and mirror, but around four is a good estimate for this rope decor idea. Position the ends of the rope at the top of the mirror, so they can be covered later by more rope. 

3. Glue the rope down

Once you’re happy with the arrangement of ropes on your mirror, it’s time to glue them down. Use a hot glue gun to do so, as this is the best type of glue to use for all types of rope, from jute to sisal rope. However, don’t glue the ends of the rope, as we will cover these up in the next step.

4. Cover the ends

To cover up taped ends, unwind a portion of the rope to get a thinner piece. Then, wrap this rope around the ends until they are covered. Be sure to glue this rope down securely at the back of the mirror.

5. Hang the rope mirror

With another piece of rope attached to the back, hang your newly crafted nautical rope mirror in a place where you can show off this impressive home DIY project. If you want to really embrace a nautical home decor theme, hang the mirror from a dock cleat like in the image above.

2. ROPE BASKET BOX

The perfect addition for any room in your home, why not create a homely box basket using some twisted jute or natural rope? All you need is a cardboard box, your rope of choice, a hot glue gun with glue sticks, and scissors. 

1. Cut the box

Choose a cardboard box of your desired size – but bear in mind that the larger the box, the more rope and glue you will need. Cut the top flaps off the cardboard box with a pair of sharp scissors. 

2. Glue rope to the box

Begin wrapping the rope around your now flap-less box. It’s easiest to start at the bottom, using your hot glue gun to secure the rope in place as you go. When you reach the top, cut the end of the rope using a hot knife cutter or your scissors, then glue down the very ends, including any frays. 

3. Use fabric to line the box

Now that you have the outside of the basket box looking perfect, it’s time to cover the cardboard interior. Use fabric to line the inside – any type of fabric will do, from coloured hessian rolls for a bright, fresh craft, to classic white muslin like pictured.

3. DIY ROPE VASE

Add a touch of rustic style to your home with a decorative rope vase, which can be displayed alongside these other 5 rustic design ideas for your home. You’ll need a vase, twisted jute rope, a glue gun and glue sticks, scissors or a rope cutter, and a heavy clip. 

1. Choose a style of rope

This rope decor idea is fairly straightforward, which means the rope you choose can make all the difference in the overall look. If you are opting for a more rustic rope vase, choosing a plain natural rope will deliver this look. However, you can really customise this craft with a variety of decorative braids, from coloured cotton and decorative polypropylene braids, to metallic braided polyester for a more luxurious look. Take a look at our guide to the best uses for decorative rope for more home DIY projects to undertake with any leftover rope!

2. Attach rope to the base

Grab your rope of choice, and add some hot glue to the inside of the rope end. Attach the rope to the base of the vase, then begin to coil it around the base tightly, adding glue to the rope. When you reach the top coil at the end, add an extra dab of glue to make sure it’s completely stuck down.

3. Let the glue set

Use a heavy clip to clamp the rope so it is secured and let it sit for a few minutes until the glue is completely set.

4. Perfect your rope vase

If you use scissors rather than a hot rope cutter to cut your rope, you may have frayed ends. Be sure to sort these out at the end, using extra glue to fuse the ends together and minimise the risk of your rope vase slowly falling apart.

4. NAUTICAL ROPE COASTERS

Learn how to make nautical rope coasters in just 3 easy steps. This is a super easy rope decor idea, as all you need is some rope and a glue gun!

1. Coil your rope together

Create a small, tight coil with your rope and glue it in place. Continue to coil and glue the rope until it reaches the perfect coaster size. 

2. Finish the ends

As you reach the ends of the coaster, use some extra glue to make sure the end is strongly stuck down. There may be some fraying, so we recommend using a hot knife rope cutter to seal the rope before you glue it down.

3. Decorate your coaster

This next step is optional, but means you can customise your rope coasters to match any theme or aesthetic you like. Create your own stencil – or simply freehand – and use paint to add designs to the top of your coasters. However, be wary of the texture of the rope, as this may not be the easiest to use brush strokes on. Let the paint dry completely before using.


These simple DIY rope decoration ideas are bound to spruce up your home, and are perfect for matching any aesthetic. Our blog is overflowing with rope decor ideas, including this gorgeous rainbow rope wall hanging. Why not take a look at our extensive range of ropes, twines and cords, perfect for inspiring your next rope decoration project! Feel free to contact us to find out some more.

Posted on Leave a comment

How to make a rope picture frame

Are you looking for a unique, creative way to display your artwork or photographs? Rope picture frames are perfect for those who want to get crafty with their home decor. Ropes, twines and cords can be used in a multitude of ways around the home, including to decorate picture frames. All you need is an existing picture frame, and the world’s your oyster! Read on to discover the different ways that you can decorate a picture frame with rope. 

How to make a rope picture frame

A rope picture frame couldn’t be easier to craft. All you’ll need is your rope of choice, a picture frame, a hot glue gun, and a knife to cut the rope. We recommend a hot knife rope cutter sealer, as this will prevent frayed ends and will make your picture frame look much neater. This craft can work with any choice of rope or twine, so there are countless different styles of picture frame that you can create. Here’s a step-by-step on how to create your rope picture frame:

  1. Glue the end of the rope to the outside edge of your picture frame to create a border around it. This is optional – you can just start on the front face of your frame if preferred. Try to keep the rope as straight as possible, bending tightly around corners. Once you have glued the rope all round the edges of the frame, cut the rope with your knife cutter and glue the final part down. 
  2. Now, it’s time for the front of the frame. If you created a rope border around the edge of the picture frame, start your front row of rope in the same corner that you did for the border. Glue the end of the rope down and begin creating a row, ensuring there are no gaps between the rope border and your new row.
  3. Continue glueing the rope to the frame, creating a row around the circumference of your picture frame. Once one row has been completed, you can move inwards for the second row, in a sort of spiral pattern. Be sure to keep the rows tight together without any gaps, and keep glueing the rope until you reach the centre of the frame. 
  4. Once you have covered all of the space on your frame, cut off the excess rope and make sure that it is securely glued down. You should now have a beautiful rope picture frame.

Rope picture frame inspiration

Love the idea of a rope picture frame, but not sure how to match it to your aesthetic? Worry not, as no two rope frames are the same. Whether you want a rustic look or a high-end, sophisticated frame, the type of rope you use will aid you in your goals. Keep reading for some inspiration for the type of rope frame you could create.

Gold rope picture frame

If you want to add some extra glitz and glamour to your home, then a gold rope picture frame is perfect. By using the method described above, you can use gold cord to turn your picture frame from drab to dazzling. If you want a more subtle golden look, then a gold sparkle bakers twine is perfect for creating a dainty picture frame.

Don’t just limit yourself to gold – try a stunning sparkle bakers twine in any colour you like for gorgeous glittering frames around your pictures. 

Cowboy rope picture frame

If you love the Western aesthetic, then creating a cowboy rope picture frame is the perfect way to highlight your photos and artwork. Cowboys often use natural hemp rope or nylon rope to create their lassos. So, using these kinds of rope to decorate your picture frames is a great way to pay homage to your favourite Western movies.

Nautical rope picture frame

Why not create a nautical theme within your home with a rope picture frame? Used for docking boats or general boating chores, a dock line or mooring rope will impress the boating fanatics in your life. Plus, these types of rope are incredibly durable and long-lasting, making a great investment in your home décor that can be used time and time again.


Interested in some more fun and fresh rope crafts? Take a look at some of the best uses for decorative rope, or check out some jute twine crafts. To enquire about our variety of ropes, twines, and cords, get in touch.

Posted on Leave a comment

Gift wrapping ideas that will bring smiles to faces

black gift wrapped presents with thin rope and twine wrapped around them on top of a table

When you’ve put a lot of thought into buying the perfect gift, sometimes you want to go a step further with your wrapping, too. Gift wrapping ideas can be hard to come by, especially if you have lots of different gifts to wrap. Read on for ten beautiful gift wrapping ideas that will make your recipient feel special.

1) Tea towel wrapping

Everyone will appreciate an extra tea towel in their home, and they can make a practical yet attractive gift. Choose a tea towel with a lovely pattern or colour palette, and use this to wrap your gift. This works especially well if your presents are kitchen themed, but it can be used for anything. Simply secure it with some gorgeous twine, and you have a quick and easy gift wrapping solution without the need for any tape. Your recipient is bound to love the extra gift, and this gift wrapping technique is also eco-friendly. You can find some more eco-friendly gift wrapping ideas in our blog post.

2) 3D gift wrapping

Who says that gift wrapping needs to be 2-dimensional? With this creative gift wrapping idea, you can create stunning 3D gift wrap that’ll bring a smile to anyone’s face. Take a look at the above example – you can try adding a toy car to your gift for a present that we doubt they’ll have ever seen before! This hack can be done in so many ways, too. You could use any small toy or figurine that you wish, or try fastening a small gift to the outside of your main present to kill two birds with one stone.

3) Metallic detailing

Sometimes, less is more. If you want an understated gift wrapping idea that still looks like you’ve put effort in, then this could be the perfect gift wrap design. Simply take some plain wrapping paper (brown looks particularly good) and draw on your own accents using a metallic pen. This simple hack really elevates your gift wrap and is very simple to do. Plus, you can pair it with some metallic bakers twine for an added flourish.

4) Watercolour paper

If you’re a fan of DIY crafts, then this gift wrapping tip could be ideal for you. Let your creative juices flow by using watercolour paints to create your own stunning gift wrap. This adds a personal touch to your gift wrapping, since it’s all been made by you. Plus, you can choose any colour scheme or patterns that you like! Just be sure to let your paper dry properly before you wrap your gifts.

5) Use photographs

Looking for a personal way to make your gift wrapping really shine? Simply print out a photograph of your choice and fasten it to your gift. You could use string or twine to hold it in place, so that you don’t risk damaging it by using tape, and your recipient can keep the photo as an added extra. Polaroid style photographs look especially good when using this technique.

6) Newspaper wrapping

Wrapping gifts in newspaper is one of the oldest tricks in the book when you find yourself without any wrapping paper. But, this hack can actually look amazing when executed right. A page that’s filled with mostly black and white text can look incredible when paired with some coloured twine or ribbon for a pop of colour. Or, keep with neutral tones and tie off with some natural macrame twine to add to the classic feel of your gift wrap.

7) Use map prints

Perfect for the travel fanatics in your life, why not try wrapping gifts in a map? You can print your own online or use a map that you just have lying around. A vintage map with some flax twine can create a classic, antique feel to your gift wrapping, while a newer map can be a fun, bright way of wrapping your gifts. You could even choose a map of a location that holds special memories between you and the recipient – it won’t go unnoticed.

8) Display your jewellery

If you’re treating that special someone to some gorgeous new jewellery, why not show it off as much as possible? This gift wrapping tip includes using jewellery, such as a bracelet or ring, to tie your gift wrapping together. Like seen in the example above, you can use a gorgeous piece of jewellery as an accent on your gift, holding it in place with some decorative ribbon twine. You’re bound to impress with your luxurious gift wrapping, and the recipient will be thrilled when they learn that they get to keep it in the end. 

9) Wax seal stamp

If you’re looking for a signature way to wrap all of your gifts, then this gift wrapping idea is ideal. Simple use a wax seal stamp to fasten together your wrapping paper or twine for a vintage yet personal look. You can get custom wax stamps of pretty much any design you like, and use it again and again to put your stamp on the gifts you wrap. These wax seals often look better with plain wrapping paper or a subtle pattern so that they can be the star of the show.

10) Snowflake accent

Most people have fond childhood memories of creating adorable paper snowflakes. They’re incredibly simple to make, and add a gorgeous accent to any gift. All you have to do is cut out your snowflake and secure it to your present with some natural cotton string or any twine you like. This is a cheap and easy way to embellish your gift wrapping – why not give it a go? If you’d like more wrapping ideas for Christmas, then give our other article a read or take a look at our range of Christmas twines.


Ropes, twines and cords can be used in so many different ways around the home and in your projects. If you’d like to find out more about what we have on offer, get in touch.

Posted on Leave a comment

10 of the best uses for decorative rope

hanging rope chair next to tables and plant with decorative rope wall features in the background

Decorative ropes are incredibly versatile and can be used for all sorts of crafts and DIY projects. No matter your skill level, a good quality decorative rope can be used to transform existing items or create brand new crafts. From flip flops to table legs, read on for 10 of the best uses for decorative rope.

1. Trimmings

Want to spruce up your furniture on a budget? Decorative rope can be used to add stylish trimmings to any furniture or curtains in your home. Strong decorative ropes, like this coloured cotton sash cord, come in over 30 colours and are the perfect choice for creating DIY trimmings. Whatever your home’s aesthetic, you’ll be sure to find the perfect colour to complement your existing furniture. Or, if you prefer a more rustic design, you could opt for a neutral decorative rope that will add a lovely texture to your furniture without being overpowering.

2. Clothes and accessories

For all the budding fashion designers out there, rope can be an exciting textile to work with. Whether you’re crafting bag handles or experimenting with a rope belt, decorative poly braids are the perfect choice for this. You could even create some cool rope jewellery – friendship bracelets are a simple yet cute accessory that make the perfect gift..

A helpful hack that’ll save you when summer rolls around is rope flip flops. Simply use your decorative rope to reinforce the thong of your flip flops, or replace it altogether. All it takes is a couple of simple knots!

3. Gift wrapping

Ever rushed to wrap a birthday present, but there’s no tape or wrapping paper to hand? If you’re caught in a pinch, neatly tying a gift with decorative rope can act as an embellishment to replace traditional wrapping. You can also use rope to tie paper around a gift, with no need for tape or adhesive.This provides you a great opportunity to try out some eco-friendly gift wrapping techniques, and it’s reusable too.

4. Fancy dress

Rope is a versatile material that you can use for pretty much any costume. Because decorative rope is often much softer than your run-of-the-mill natural rope, it won’t irritate your skin when wearing it. If you’re attending a Toga party anytime soon, a stunning gold cord is the best solution for tying your outfit together. For those of you really looking to impress, it’s even possible to create a puppet costume with ropes that control your arms and legs.

5. Macramé

There are so many macramé craft ideas out there for you to get stuck right into. It’s a really simple craft that’s ideal for beginners, and you can make just about anything, from macramé bags to wall hangings. You can use virtually any rope for these crafts, but there is also specialist macramé twine for more advanced macramé artists.

6. Seasonal decorations

Metallic decorative braids are the perfect way to create some seasonal cheer in your house. Grab some silver and gold braid to craft some handmade Christmas decorations – you can even use them as an eco-friendly substitute for plastic tinsel. Not to mention, this braid is gorgeous for wrapping Christmas presents that you want to sparkle and shine.

Decorative rope is also great for Halloween decorations – create a quick and easy giant spider’s web with any kind of rope you have on hand! We have lots of homemade Halloween craft ideas, and many of these can be repurposed for different occasions, too.

If you want attractive decorations that won’t go out of season, metallic braids can also be used to create space-themed decorations that are truly out of this world.

7. Around your garden

A popular garden DIY craft is using decorative rope to make a fence that can be placed around decking or the perimeters of your land. A good, sturdy rope is ideal for creating a decorative rope fence for visitors to use when exploring your garden, especially if the ground is uneven. They’ll also make your decking look more attractive, and you can incorporate bold colours to make your decorative garden rope fence stand out.

Decorative rope can also be used around your garden to build DIY furniture, such as rope chairs and outdoor ottomans. You don’t need to sacrifice bright colours when using decorative rope for these crafts, and our ropes are incredibly sturdy and waterproof to withstand all weather conditions.

8. Rope signs

Decorative rope is a reliable and charming way to hang signs both indoors and outdoors. Whether for a business or inside your home, decorative rope’s a simple solution for hanging any sign or picture frame on walls.

However, ropes can be used for much more than just hanging signs. You can create your own patterns or messages by glueing decorative rope to a board to create a customised sign. Decorative rope is really easy to manipulate, so crafters of any skill set can try their hand at creating a stunning rope sign. Make sure to craft your rope sign on a flat surface so you can lay out your chosen design before sticking it down to make sure you’re happy with it.

9. DIY home furnishings

There really are no limits to how rope can be used for DIY home furniture design. Simply grab your decorative rope and set it into a coil shape to create a simple rope bowl – perfect for storing keys or nick nacks. A similar technique is used to create plant pots, vases or lampshades from rope – all you need is rope and glue. You can also use rope to replace drawer handles – this feature can create a seaside feel when combined with other simple nautical home decor ideas.

If you want more of a challenge, why not create a large rug with your decorative rope? It’s pretty simple – just lay the rope in your desired spiral and adhere it together. If you still want to go bigger, try embellishing table legs by wrapping them with decorative rope.

10. Pet accessories

Pets can be destructive, so consistently buying more toys and accessories for them gets pretty expensive. Luckily, lots of pet accessories can be DIYed using decorative rope. You’ll never run out of your pet’s favourite rope chew toy, as decorative rope can be bought in rolls of up to 100m.

A rope basket is a great way to store pet toys that won’t get damaged easily if your pet likes to chew things. Decorative rope is waterproof and incredibly durable, so no need to worry about damage from slobbering mouths. Speaking of chewing – you can create a simple chew toy for your pet by tying two knots at each end of a length of rope. Perfect for tug of war!

Some more accessories that are easy to DIY are cat scratching posts and dog leashes. As your pet engages in some wear and tear, you’ll have peace of mind knowing that your leash or toy can be replaced within minutes with some rope.


Not sure where to buy decorative rope? Look no further – we have a gigantic collection of ropes, twines and cords for all your home and garden improvement needs. Contact us to order your supply of decorative rope.

Posted on Leave a comment

5 uses for hessian fabric

hessian fabric bag

What is hessian fabric?

Hessian fabric is a completely biodegradable material made from natural jute or sisal fibres. These fibres are woven together to form a strong breathable fabric. Hessian can withstand condensation and rough handling, making them popular for frost sheets and protecting outdoor items.

What is the difference between hessian and jute?

Hessian, although made from jute, has a different composition to regular jute material. Hessian is a finer form of jute – this is what makes it breathable – whereas jute itself is coarser. Both types have benefits, but hessian’s finer jute weave improves its storage capabilities due to having a greater air flow.

Uses of hessian fabric and hessian rolls

You may or may not have heard of hessian fabric, but there are actually a lot of uses for this biodegradable material. We have put together a list of uses for your hessian fabric:

Crafts

hessian rolls

Hessian rolls are perfect for craft and home decor. Whether you’re repurposing your garden hessian sacks, or purchasing some new coloured hessian rolls, both are great for crafting. Make anything from hessian Christmas stockings and decorations, to everyday homeware items such as placemats and coasters. There are lots of different craft ideas to choose from.

Upholstery projects

If you have any upholstery projects, you can use hessian for these too. Padding chairs and sofas with hessian roll, or covering them with your choice of hessian, makes for a great addition to your home. Get in touch with your sustainable side and use hessian fabric on or in your furniture.

Hessian sacks

hessian sandbag

A common use of hessian is to form sacks. Hessian sacks can be used in a variety of ways and can also be reused over and over again – making them extremely sustainable. Due to the breathability of hessian sacks, they can be used to safely store rice, coffee, potatoes and other food items, and they’re great for storing outdoor possessions. Some hessian sacks are also rot proof, making them even more compatible with food and possession storage, and they can even be used for sack races on sports day, too.

These sacks can also be filled with sand to make hessian sandbags. These are great if you live in an area that is likely to flood, or if you want to give sandbag exercises a go to spice up your workouts.

Agricultural uses

Apart from storing the things you’ve grown, you can also use hessian fabric, and sacks, as grow bags. Hessian is the perfect material for a grow bag due to its breathability and its ability to protect plants from frost or other extreme weather conditions. Hessian rolls can also be wrapped around exposed roots to make transporting and replanting plants easier – prevents crop damage. As hessian is biodegradable, it ensures that everything in your garden remains natural.

Exposure protection

hessian frost sheet

Used for both construction and agricultural purposes, hessian frost sheets are an ideal form of protection. Hessian can also withstand many other forms of extreme weather, such as heat, so keeping your items wrapped up in hessian is very beneficial.

Hopefully we have convinced you that hessian can have a wide range of uses. So, why not take a look at our hessian range? If you have any questions, our team is always on hand to help with any enquiries. Get in touch today.